
FILM EMULATION
FOR DAVINCI RESOLVE
FILM STOCK
LUTS
LENS
POWERGRADES
TEXTURE
POWERGRADES
COLOR
POWERGRADES
OVERLAY
POWERGRADES
INTRODUCTION
TO FILM AESTHETICS
This project is about reproducing characteristics that I personally associate with film aesthetics. I have therefore dealt intensively with the emulation of film stock and decided to built two film stocks of my own.
In addition, the film aesthetic does not end with matching colors. I’m interested in lens flaws like chromatic aberration, lens distortion, petzval field curvature, and so on. Furthermore, I’m also interested in recreating special “sharpness aesthetics” and other texture elements like Halation, Flicker, Gate Weave and Film Damage.
I will also show you some techniques on how to achieve a higher “color density”. For film print emulation, I’ve created some PowerGrades that will teach you how to be more flexible with Print Film Emulation LUTs from DaVInci Resolve and customize them to your own preferences. Additionally, I designed some dirty mattes and created digital sprocket holes for an overscan look to top it all off.
Have fun scrolling.


FILM STOCK
LUTS

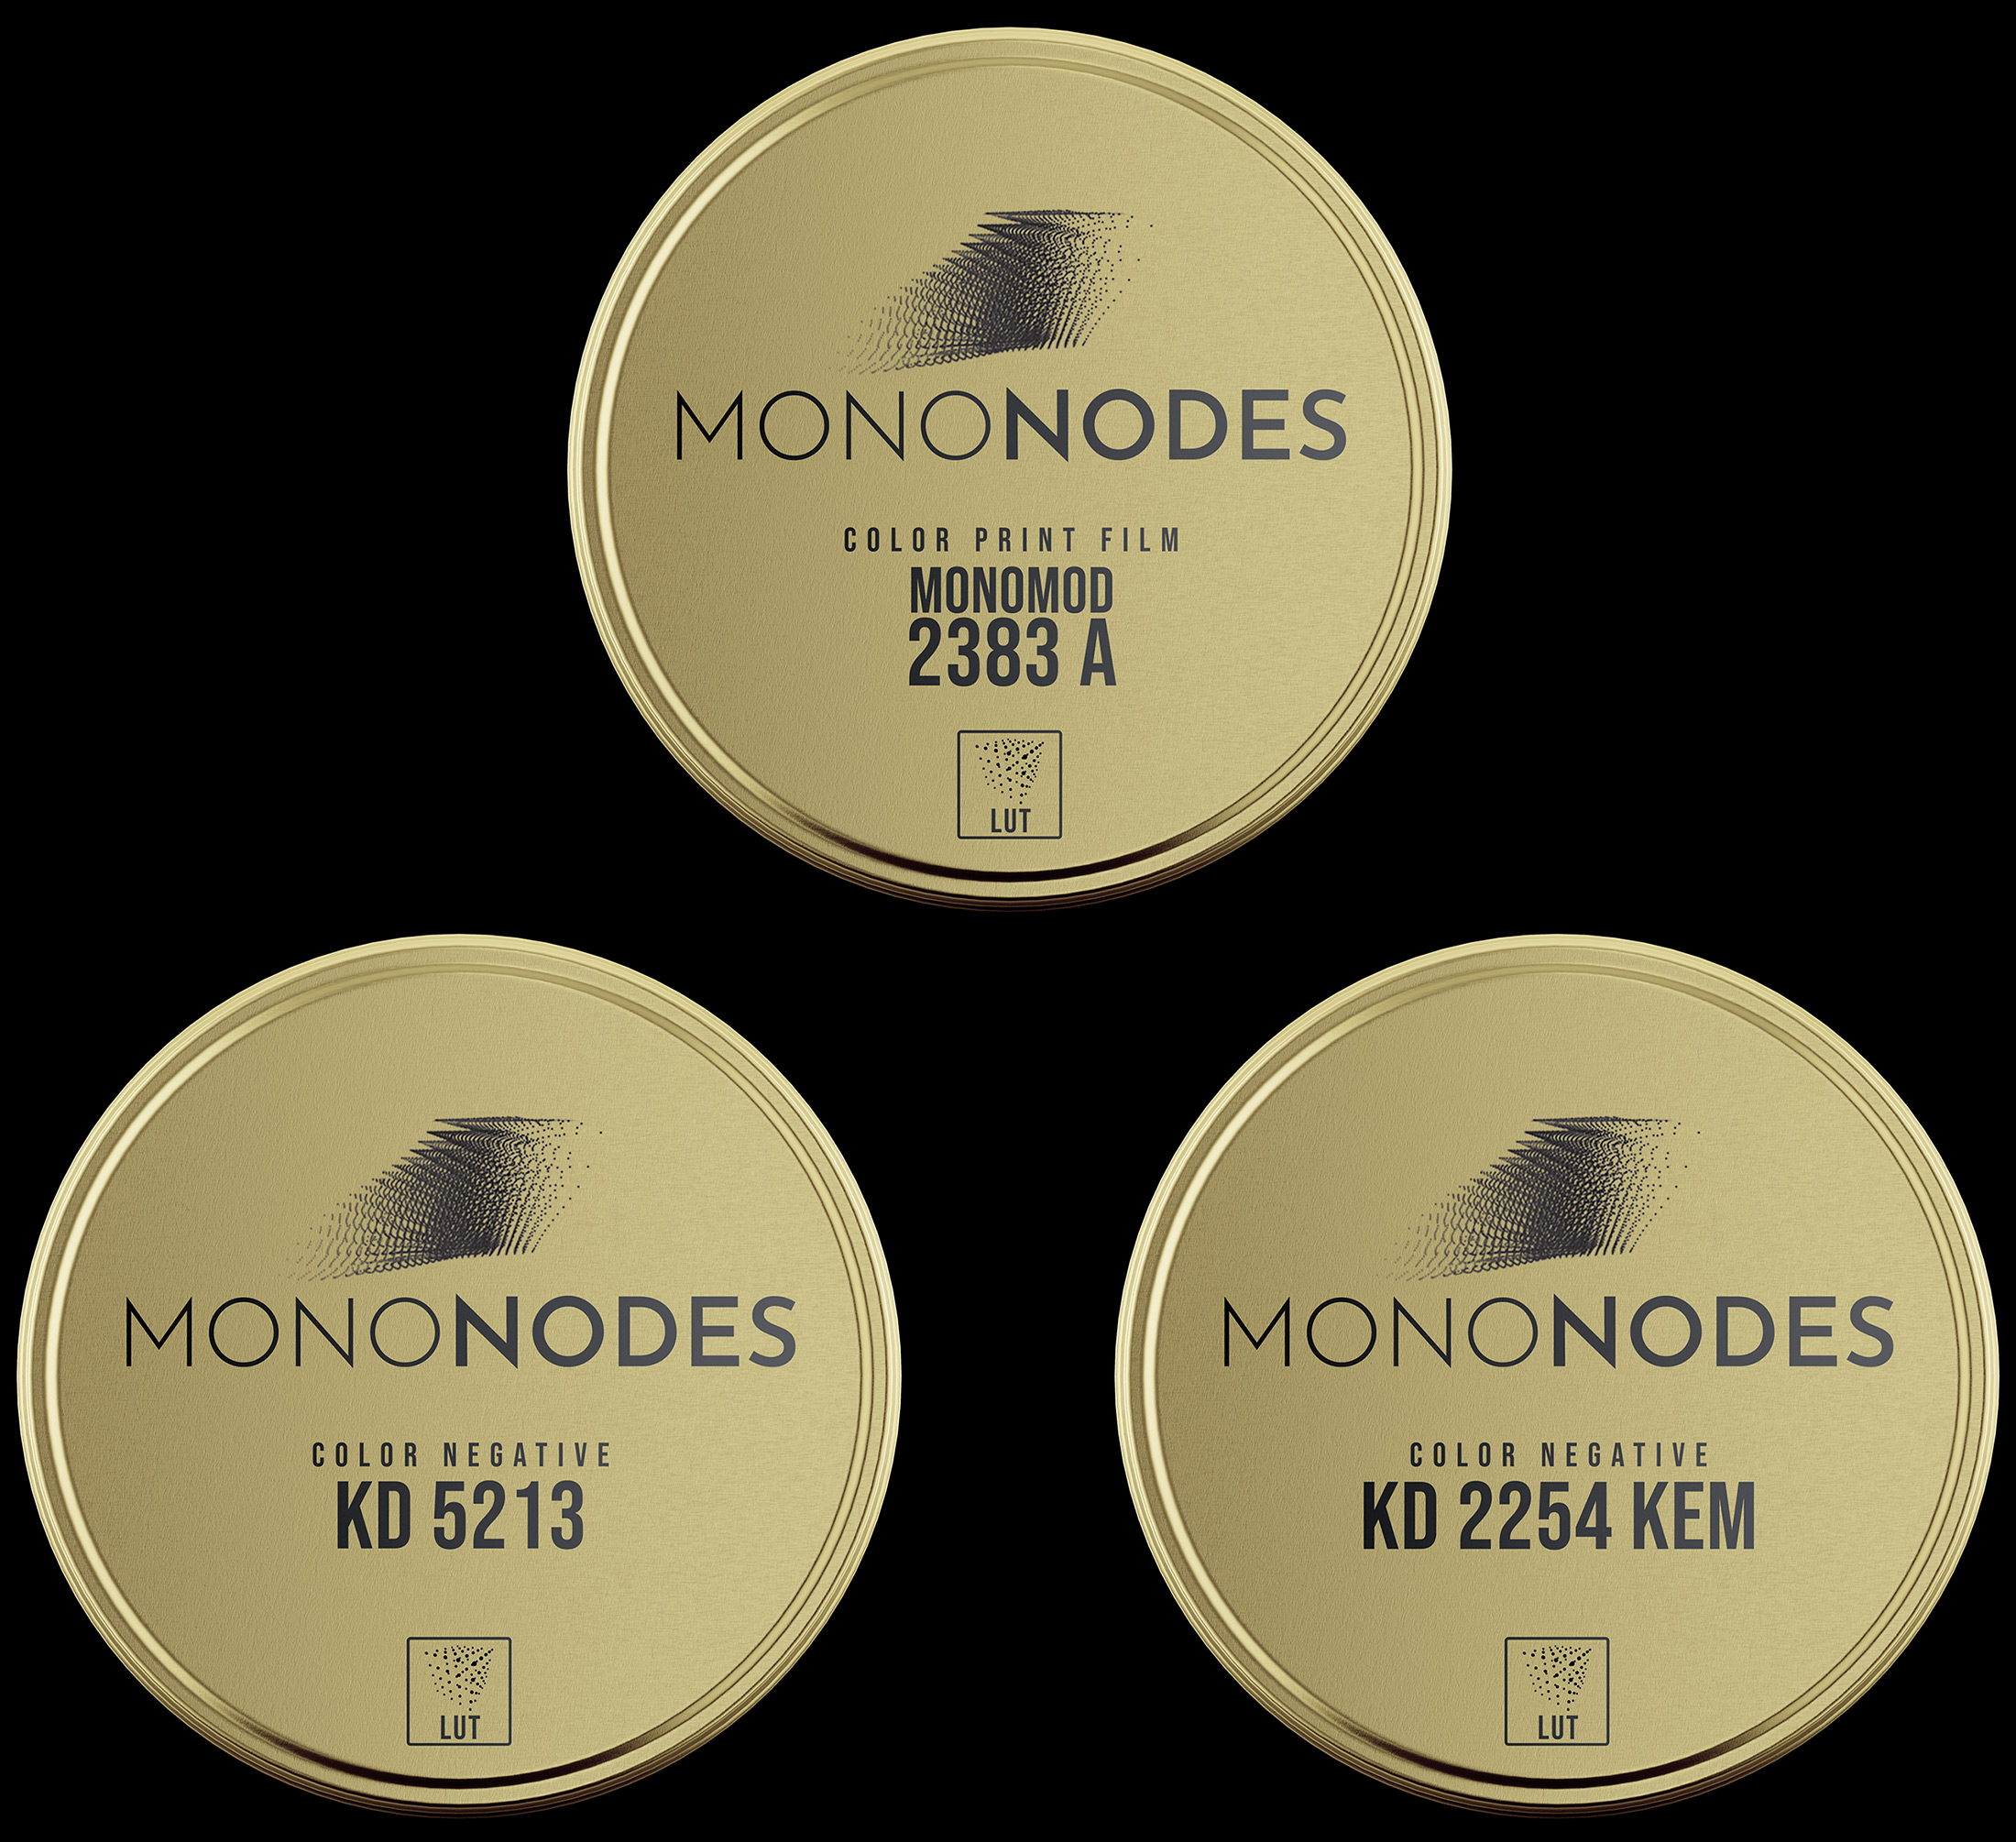
KD 5213
KD 5213′ LUT: Crafted with inspiration from ‘KODAK VISION3 200T Color Negative Film 5213’. No official association with Kodak.
The LUT expects “Arri Alexa / Arri LogC” (Color Space / Gamma) as input signal and are designed to work with DaVinci Resolve’s Rec709 Print Film Emulation LUTs.
KD 2254 KEM
The “KD 2254 KEM” LUT is inspired and designed by the look of the “FotoKem’s SHIFTai” project. No official association with FotoKem. The LUT expects “Arri Alexa / Arri LogC” (Color Space / Gamma) as input signal and are designed to work with DaVinci Resolve’s Rec709 Print Film Emulation LUTs.
MONOMOD 2383 A
The “MONOMOD 2383 A” LUT is designed after “KODAK VISION Color Print Film 2383” with included neg. Film and a Film Matrix. The Final Print is a modified version of the Kodak 2383 LUT by DaVinci Resolve.
Please read “WHY I BUILD LUTS” for more information on why and how I build these LUTs.
LENS
POWERGRADES

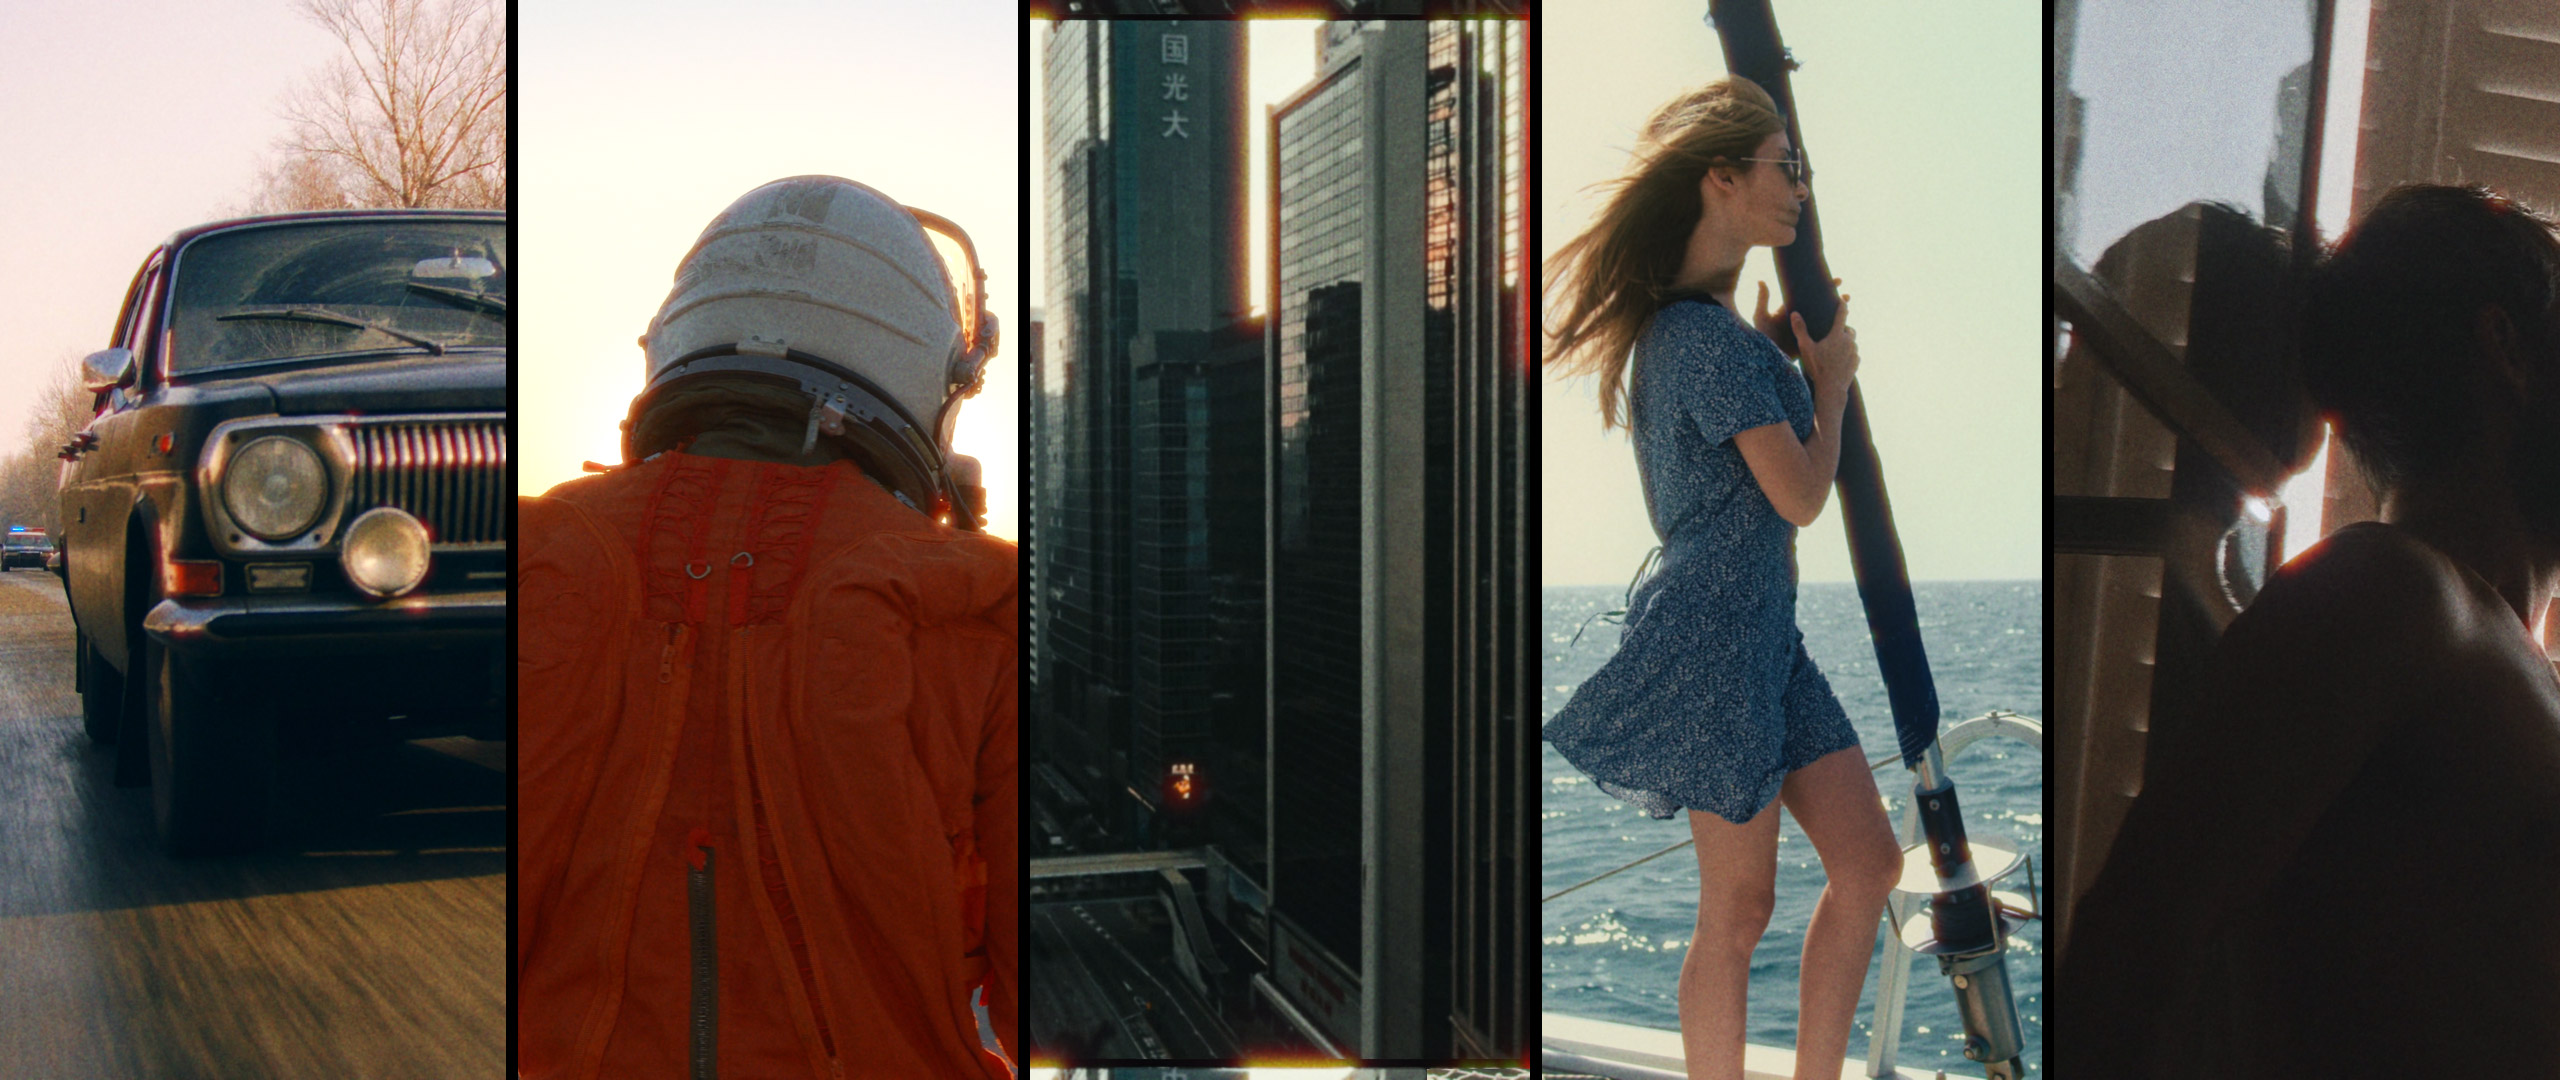
LENS CHARACTERISTICS
REFERENCES
CHROMATIC ABERRATION
PETZVAL FIELD CURVATURE
LENS DISTORTION

The Assassination of Jesse James by the Coward Robert Ford (2007)
Directed by Andrew Dominik
© Warner Bros. Pictures
Homecoming (2018)
Directed by Sam Esmail
© Amazon Prime Video
Homecoming (2018)
Directed by Sam Esmail
© Amazon Prime Video
Mindhunter (2017)
Directed by David Fincher
© Netflix
Knives Out (2019)
Directed by Rian Johnson
© Lionsgate, MRC
Click here for more lens
characteristics references.


CHROMATIC ABERRATION
Chromatic aberration is a failure of a lens, as a result of which light rays focus at different points depending on the wavelength. Lateral Chromatic Aberration is only seen at the edges of an image. Some lenses create complex color fringing that often combines two complimentary color types: red & cyan and/or blue & yellow. In the package you will find two chromatic aberration presets. In this package you will find two chromatic aberration presets.
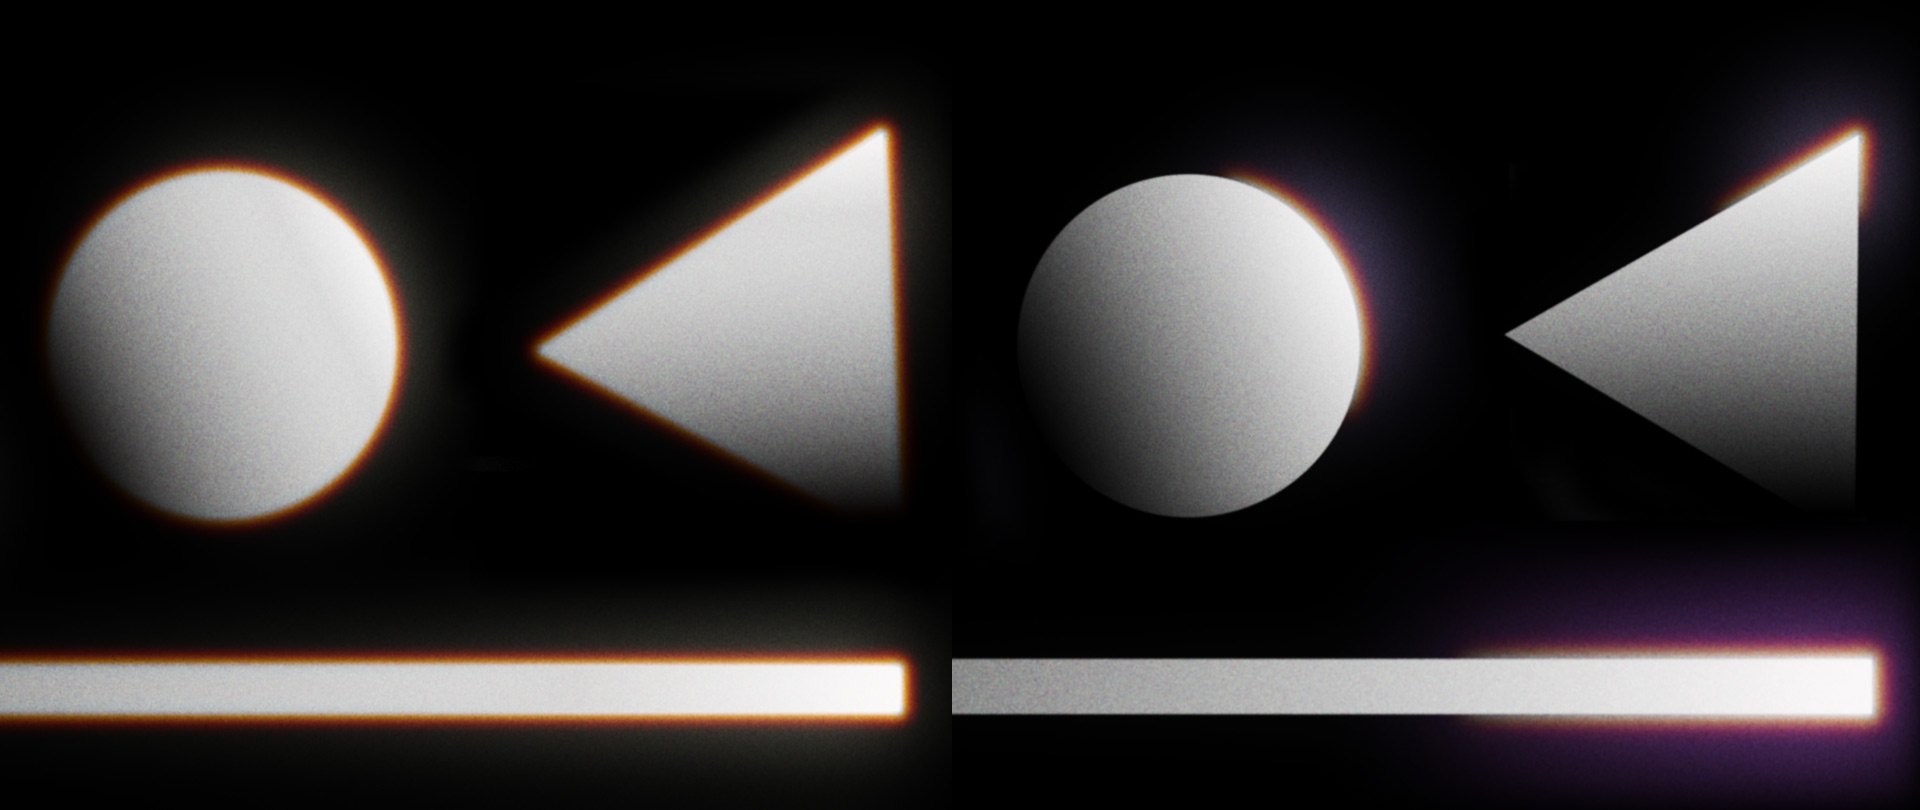
LENS BLUR / PETZVAL FIELD CURVATURE
“Petzval’s curvature of field” is an optical problem that causes a flat object to appear in focus only in a certain part of the image, instead of being consistently sharp over the entire image area. It does this because of the curved nature of optical elements, which project the image curved rather than flat. In DaVinci Resolve, if you try the Lens Blur Open FX plugin or just draw an oval mask and blur it, the results are not satisfactory. As you can see at the images on the left. So I built my own PowerGrades for a lens blur effect that is more realistic.


LENS DISTORTION
Distortion takes place when the straight lines of an image appear curved or misshapen in an unusual way for the eye. Lens distortion is primarily characterized by very regular and symmetrical patterns. The three most common types are known as “barrel distortion”, “pincushion distortion” and “mustache distortion”. For this package, I designed three types of barrel distortion, depending on the focal length of a lens.
LENS GLOW / BLOOM
The default setting of Davinci Resolve Glow OpenFX plugin reminds me a lot of the Black Pro-Mist Filter by Tiffen, which will reduce the contrast and overall brightness of your image. It creates a dreamy, blurry effect that “blooms” the lighting. My Powergrade is inspired by the Black Pro-Mist filter, but I’ve changed the settings a little so that it not only softens around the highlights, but instead subtly softens the entire image, which is suitable for day and night scenes.


TEXTURE
POWERGRADES


HALATION
Halation is a characteristic of celluloid film when a bright light bounces back a few times exposing the film a second time only affecting the red layer (and a bit of the green layer) of the film resulting in a reddish/orange glow. The Halation tint may be different based on white balance adjustments / color grading.
Since Resolve version 17.3, an OpenFX halation tool has been included in the Studio version. It’s okay, but the edge detection seems a little buggy and can sometimes produce artifacts. I’m still using my specially created Halation Node tree, which I’ve modified minimally to increase the Halation effect, and the user manual shows you some tricks on how to create a second glow. It always helps to work with reference images to get the image right. Check out “A Study on Halation for inspiration, where I recently added some new still images.
GRAIN
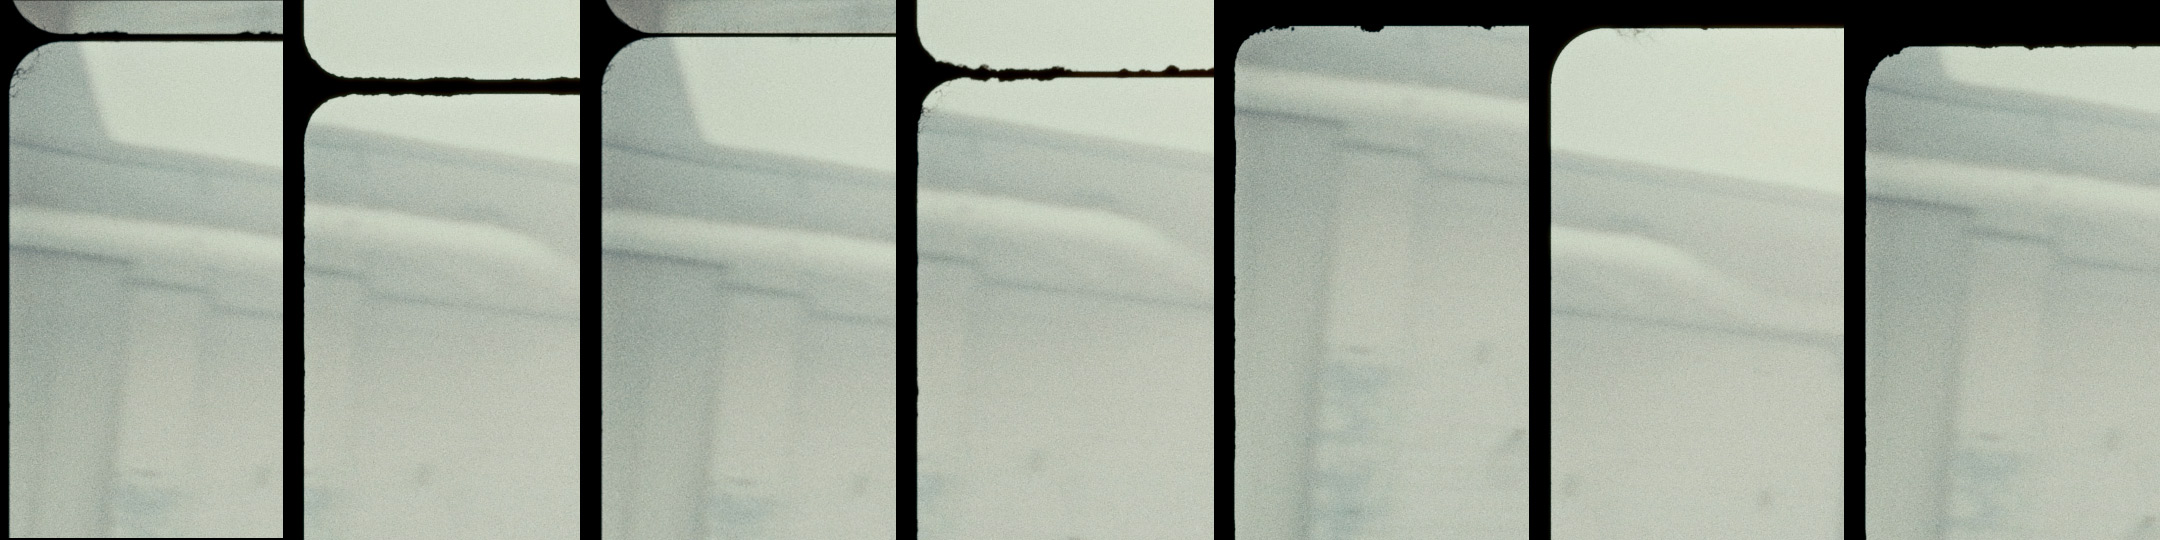
Film grain is the random optical texture of processed photographic film of light-sensitive silver halides that change into pure metallic silver when exposed to light. In the image above, you can see a comparison between real grain and Resolve Grain.
The PowerGrade in this pack is the default OpenFX preset “16mm 500T” by DaVinci Resolve (Studio Version). I still think that “Resolve Grain” is pretty good, and the tool has all the sliders to emulate “real grain”. Like with Halation the best way to fine-tune the grain is to work with references, which you can find here.


GATE WEAVE & FLICKER
Film is always moving. When a film frame passes through a camera, scanner or projector, sprockets control the motion of the frames. A film can become warped or gear can wear out, causing the frame to appear to move side to side.
For this pack I’ve added a few more nodes to the PowerGrade that emulate “micro jitter” combined with a node for the standard gate weave effect, inspired by movies from the 80’s and 90’s. I’ve also added a new “RGB Flicker” node that affects each RGB value separately, which is more accurate.
SOFTEN & SHARPEN
In this pack you will find some sharpening techniques that mimic the sometimes very hard film sharpening. Which of course can be modified and reduced at will. I also combined it with advanced softening techniques.


FILM DAMAGE
Included in this pack is a 20-second video loop with Film Damage elements. I used the overlay for the “FotoKem / Butterfly Comparison Video” which you can find by scrolling down this page about “Why I build LUTs”. This overlay was created using my “Film Damage Generator” which can be purchased separately.
COLOR
POWERGRADES


Moonrise Kingdom (2012) / Directed by Wes Anderson / © Focus Features
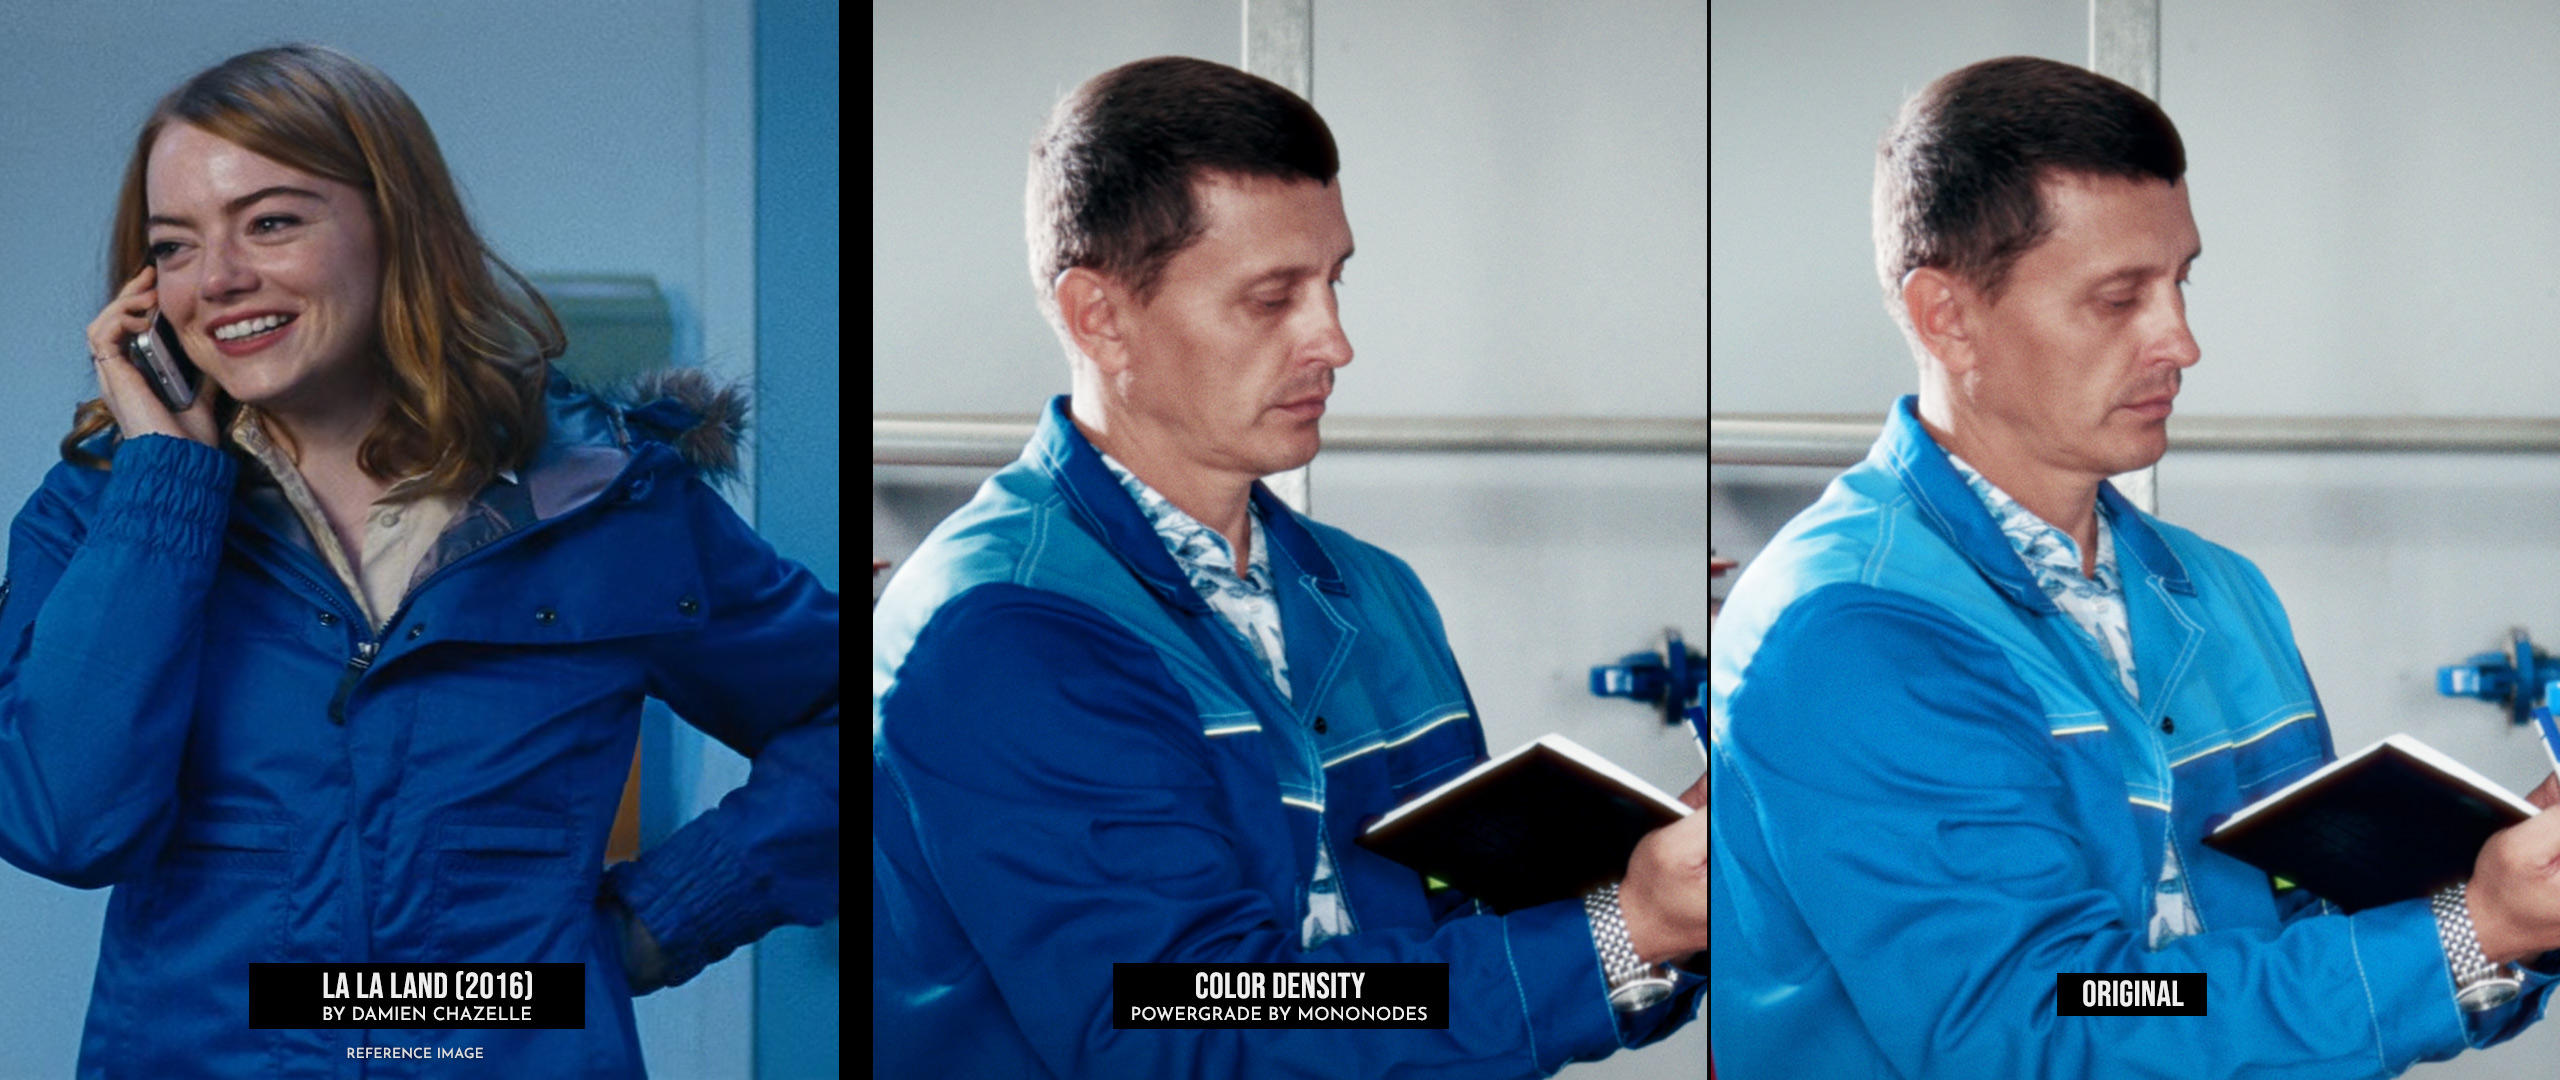
La La Land (2016) / Directed by Damien Chazelle / © Lionsgate
COLOR DENSITY
In the package you will find two PowerGrades that allow you to create “deep, rich saturated colors” that blend well with the surrounding less saturated colors. The first PowerGrade gives you overall “denser” colors for RED, BLUE & GREEN. The second PowerGrade allows you to increase or decrease the luminance values of each color individually.
With these PowerGrades you can create film-aesthetic colors that are usually only possible with Print Film Emulation LUTs. Of course, you can mix the color density nodes with a print film emulation as you like.


FLAT FILM LOOK
REFERENCES & RECREATION
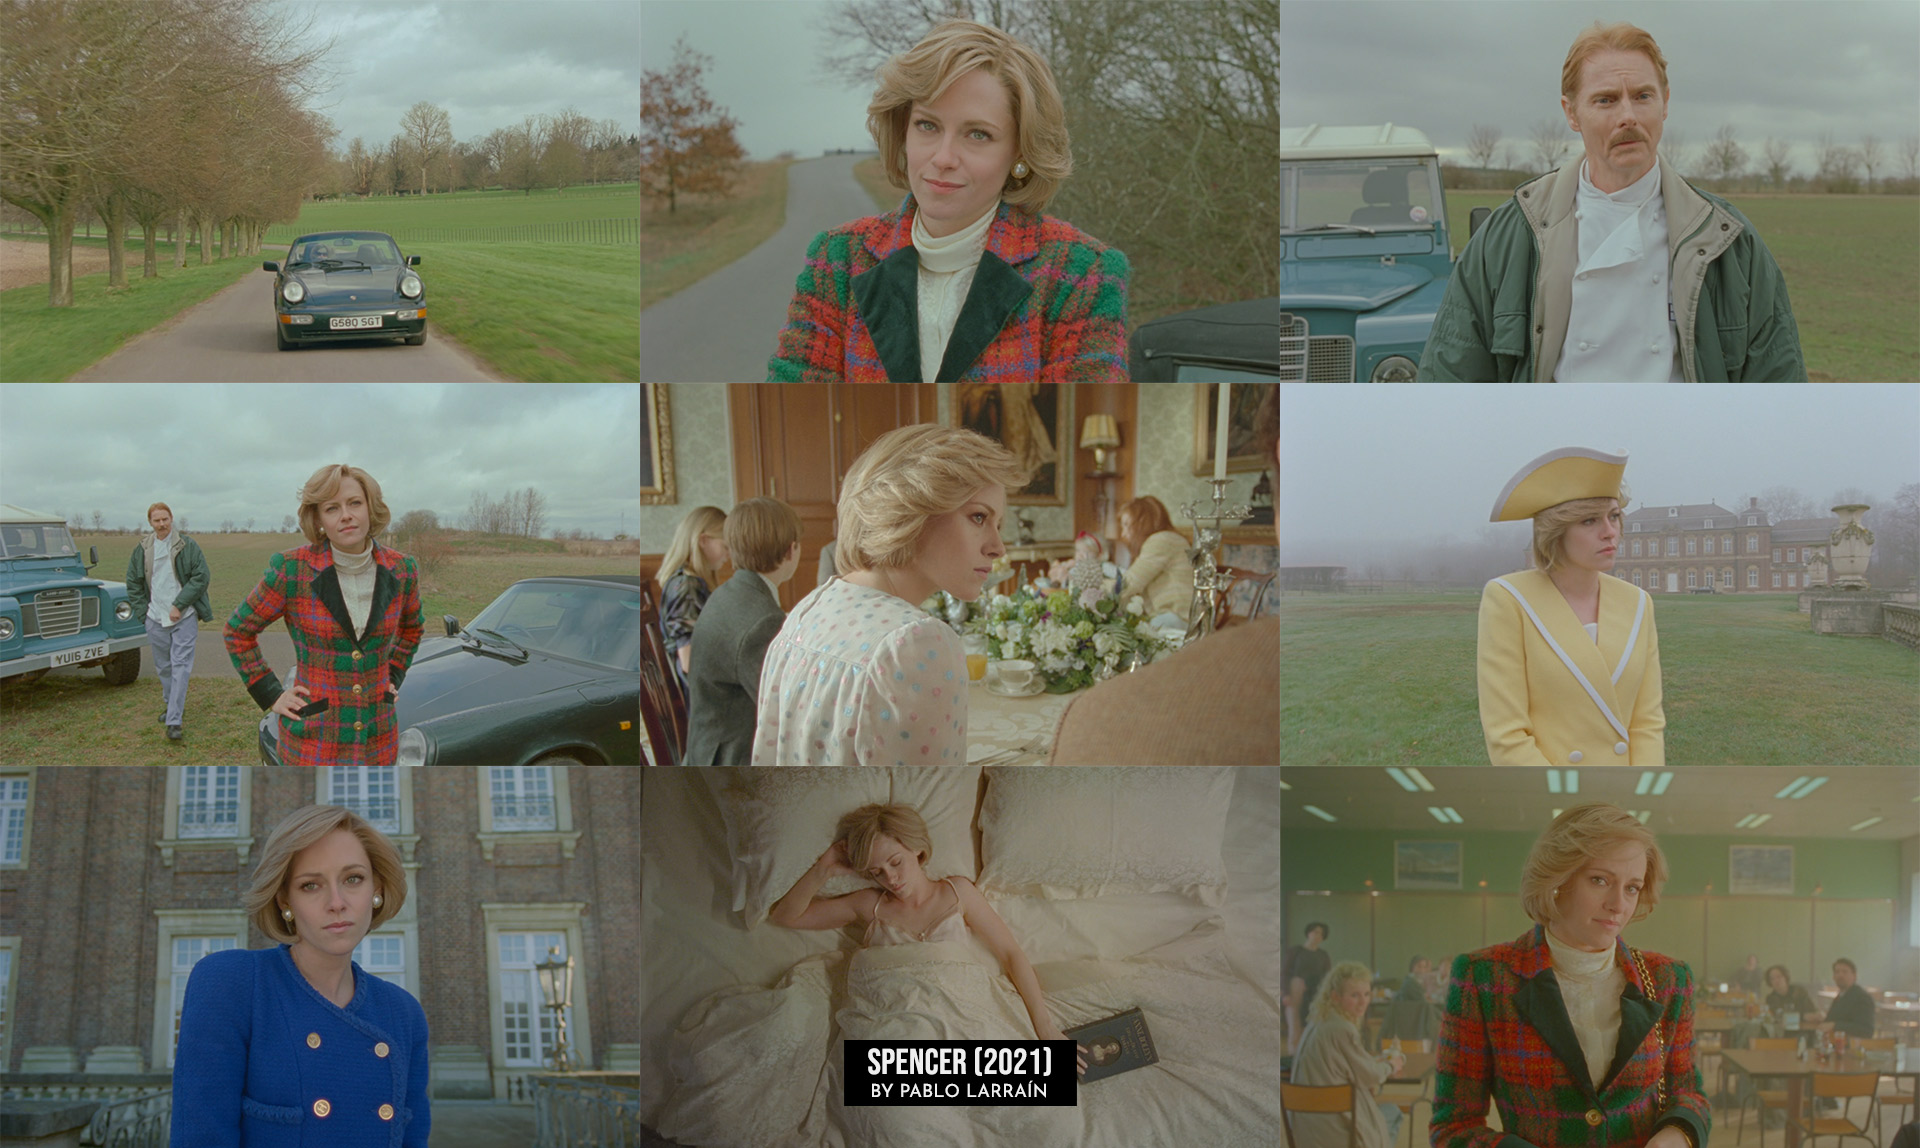
Spencer (2021)
Directed by Pablo Larraín
© Neon Topic Studios (US) / STXfilms (United Kingdom)
REFERENCE IMAGES
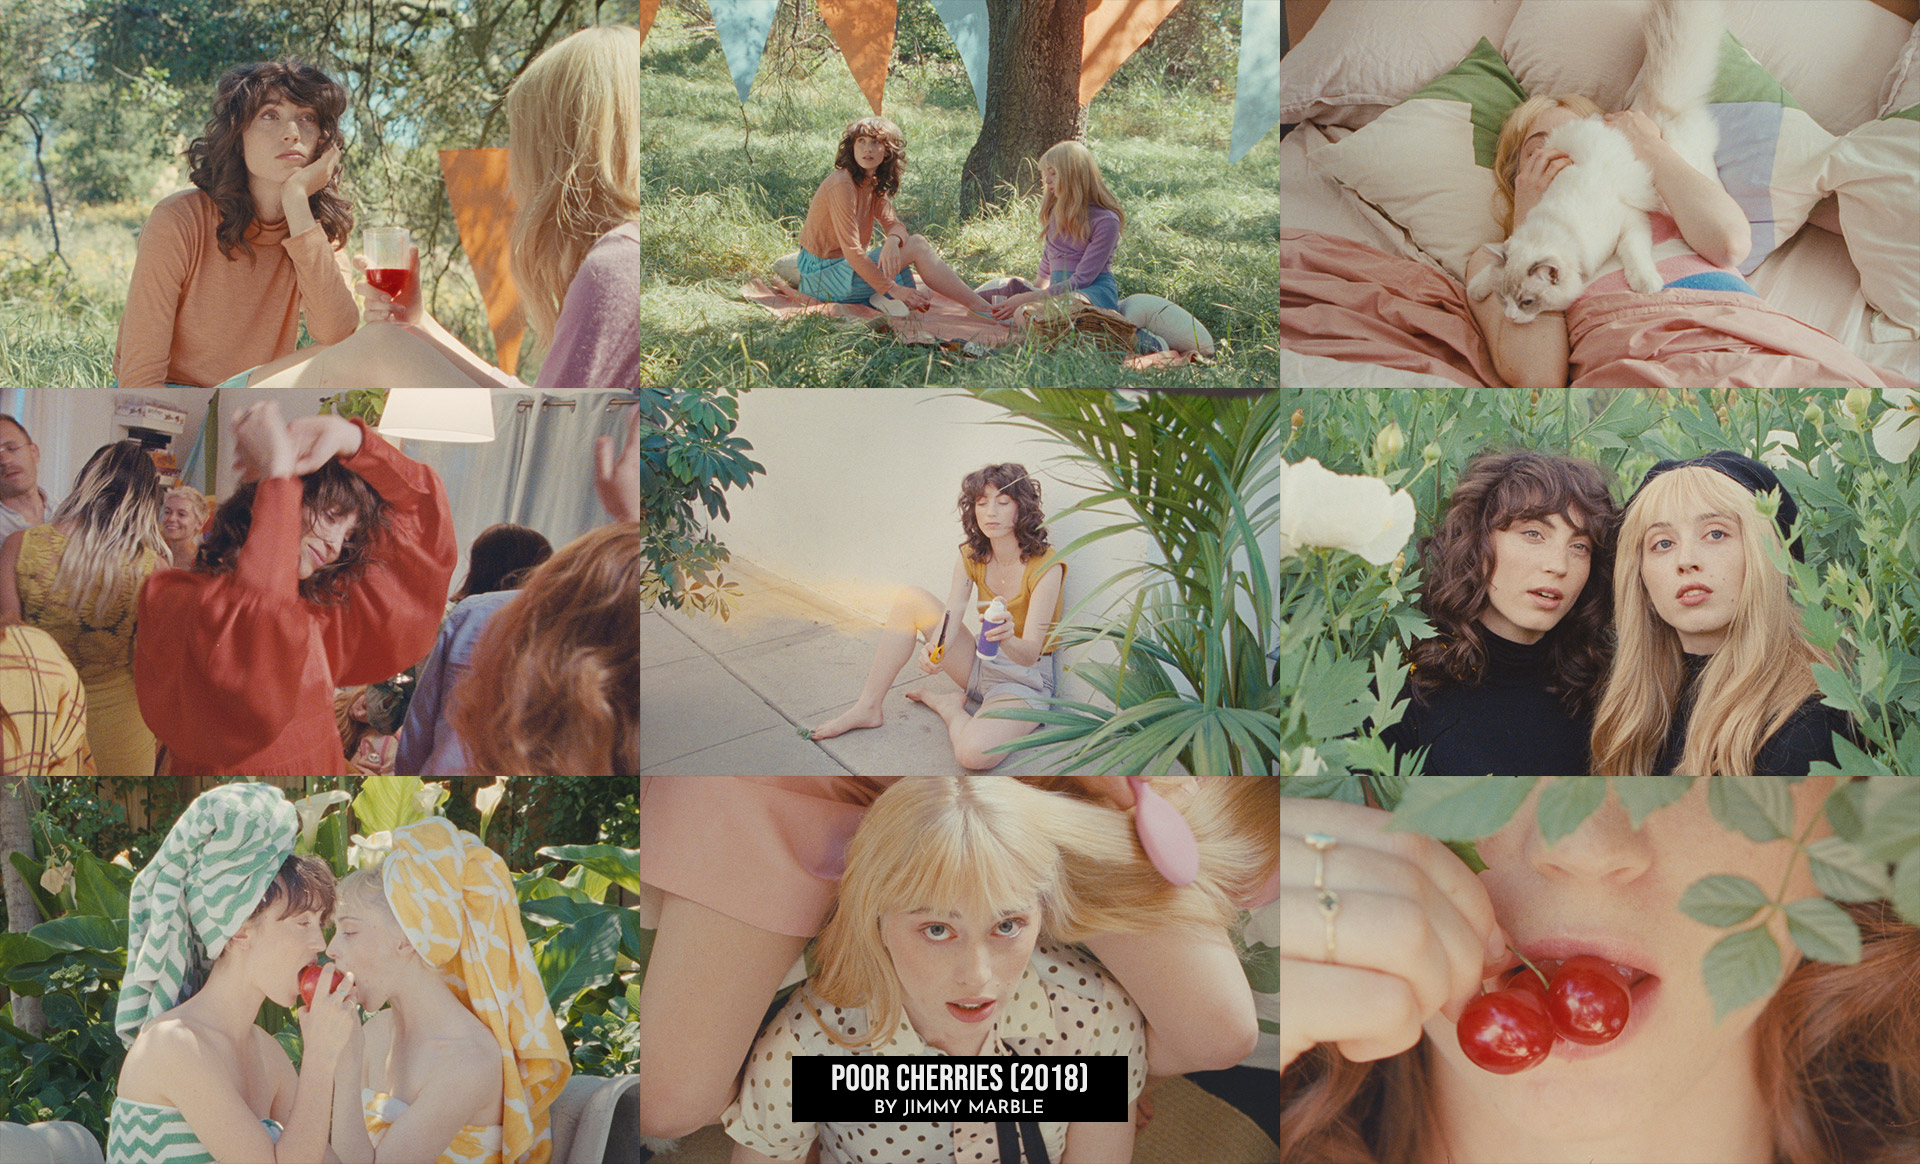
Poor Cherries (2018)
Directed by Jimmy Marble
Written by Jimmy Marble and Forrest Perrine
REFERENCE IMAGES
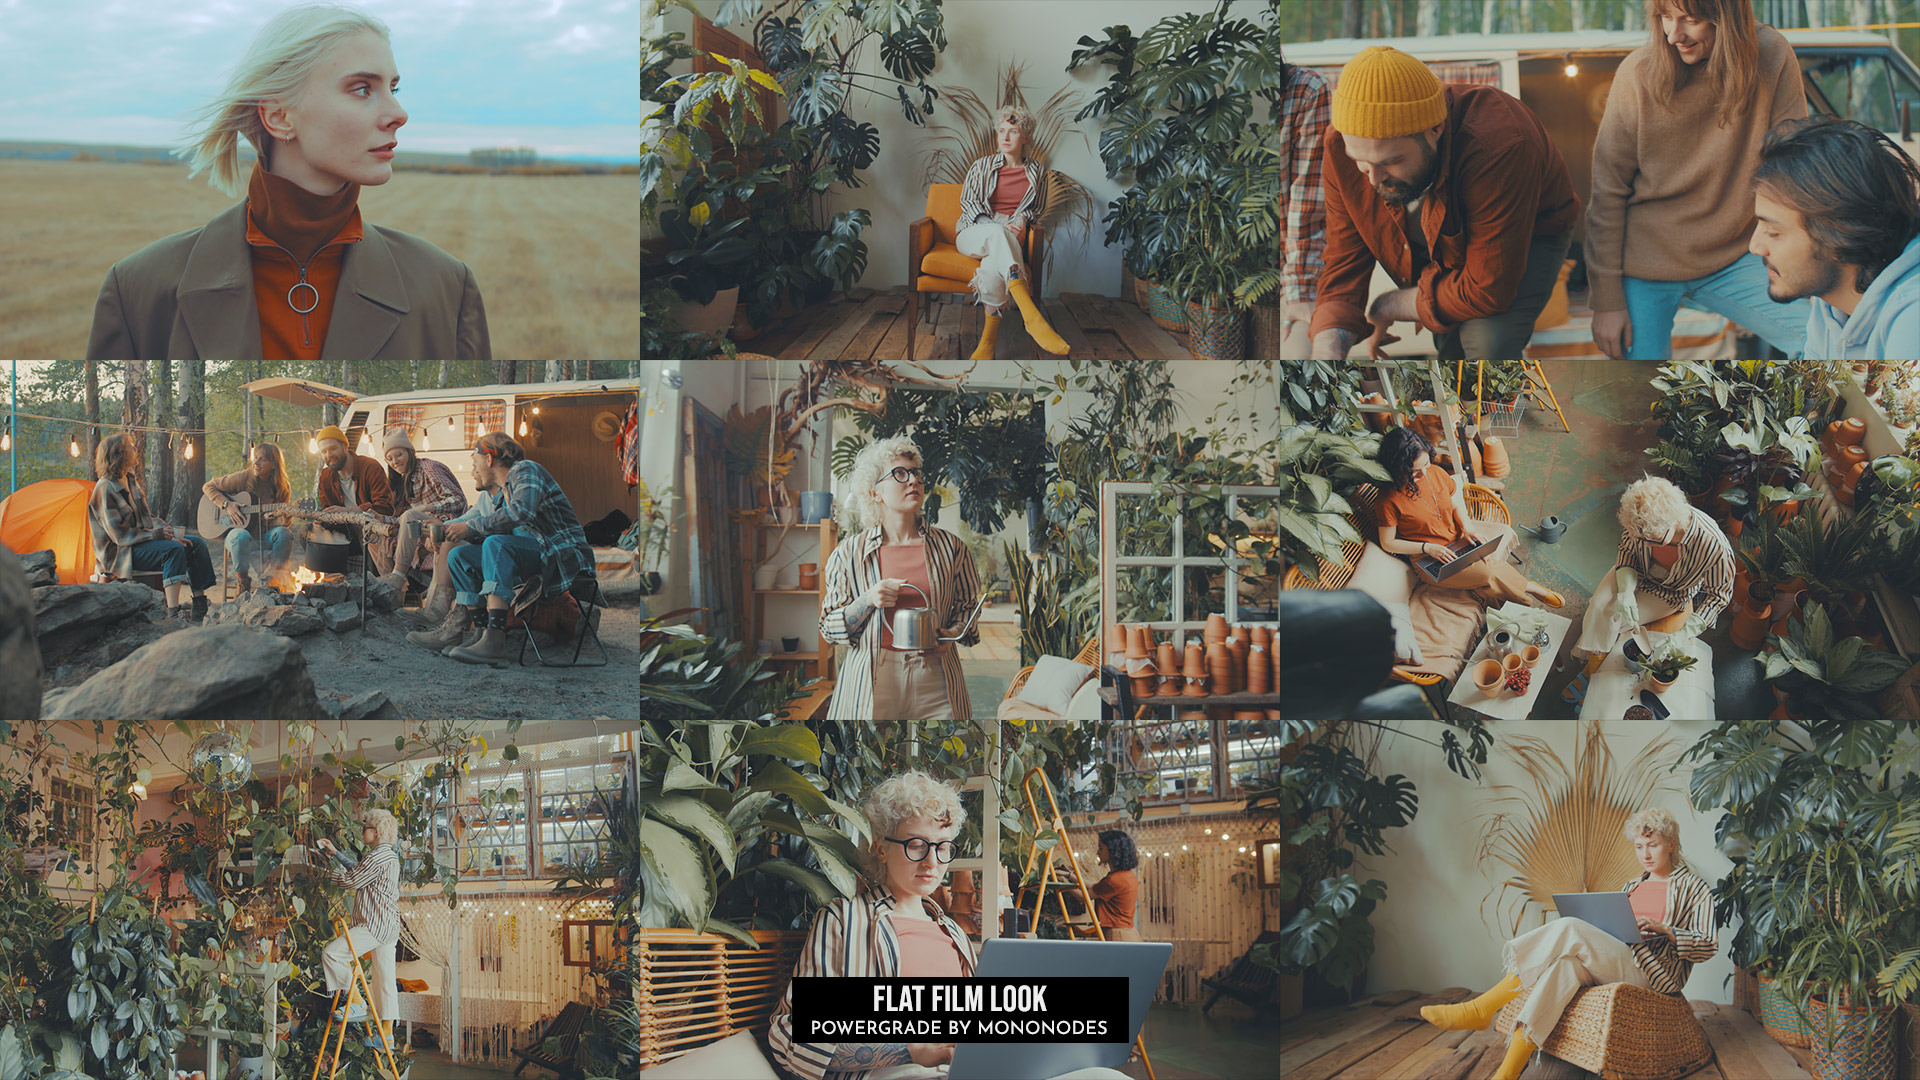
MONONODES (2022)

Visit
EXAMPLES – FLAT LOOK
for more “Before/After” images.
SOFT HIGHLIGHT ROLLOFF
I’ve also created some PowerGrades that teach you a technique for smartly manipulating print film emulation LUTs like the popular Kodak 2383 LUT by DaVinci Resolve. For example, you can flatten the contrast curve to create a flat film look, but retain the colors and mid-grey range. The PowerGrade and User Guide will also show you how to easily create a nice highlight roll-off and teaches you how to soften the shadows. Depending on the look you want.
DEEP NEUTRAL BLACKS
Additionally, I added some PowerGrade specifically for the Kodak 2383 LUT, which neutralizes the blacks and brings the shadows closer to zero to get deep rich blacks. Please refer to the User Guide for further instructions on using these PowerGrades.
OVERLAY
POWERGRADES


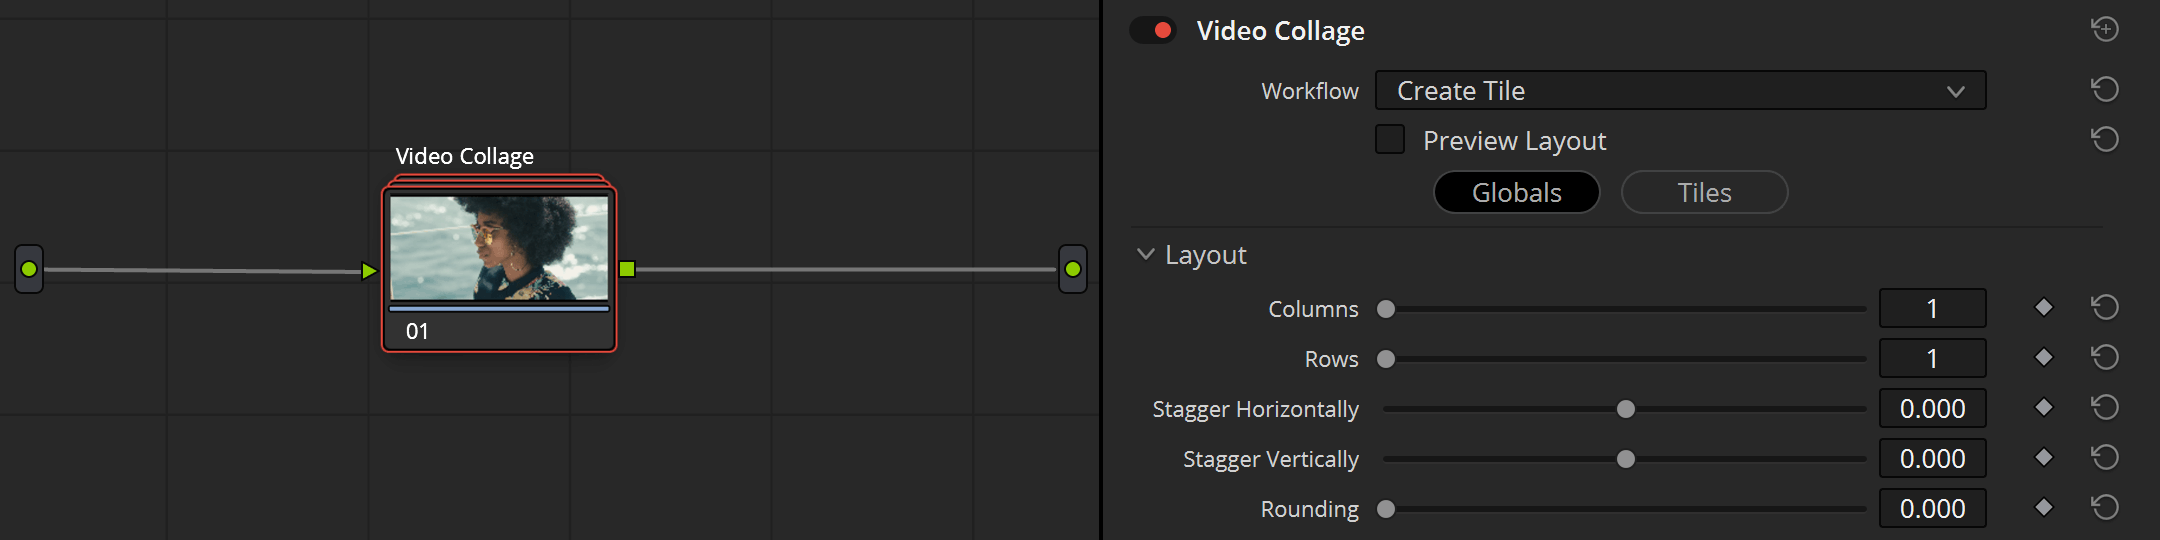
VIDEO COLLAGE
This compound node splits your footage into three frames. The preset is designed for a 1:85 Dirty matte, but can be quickly adjusted to other mattes. I separated “dirty matte” and “sprocket hole” for more flexibility. This allows you to add film grain, halos, light leaks, and film damage elements without affecting the sprocket holes.
DIRTY MATTE
I created several dirty mattes for different aspect ratios. 40 total. 3840×2160 pixels. PNG
20 single-frame dirty mattes
for these aspect ratios:
1.33:1 / 1.66:1 / 1.85:1 / 2.00:1 / 2.35:1
20 three-frame dirty mattes
for these aspect ratios:
1.33:1 / 1.66:1 / 1.85:1
SPROCKET HOLES
I designed 4 sprocket holes for this package.
Codec: QuickTime mov, DNxHR with alpha channel
Resolution: 540 x 540 pixel (square format)
Frame rate: 24 fps
Length: 10 second loop
The holes are centered, so you can move, stretch, twist and turn these sprocket holes until you are happy with the result. You can change color and intensity with curves and log wheels.
USER GUIDES

The package comes with PDF user manuals. This includes information on how to install and use each PowerGrade created, making it easy to deconstruct and understand each Node.
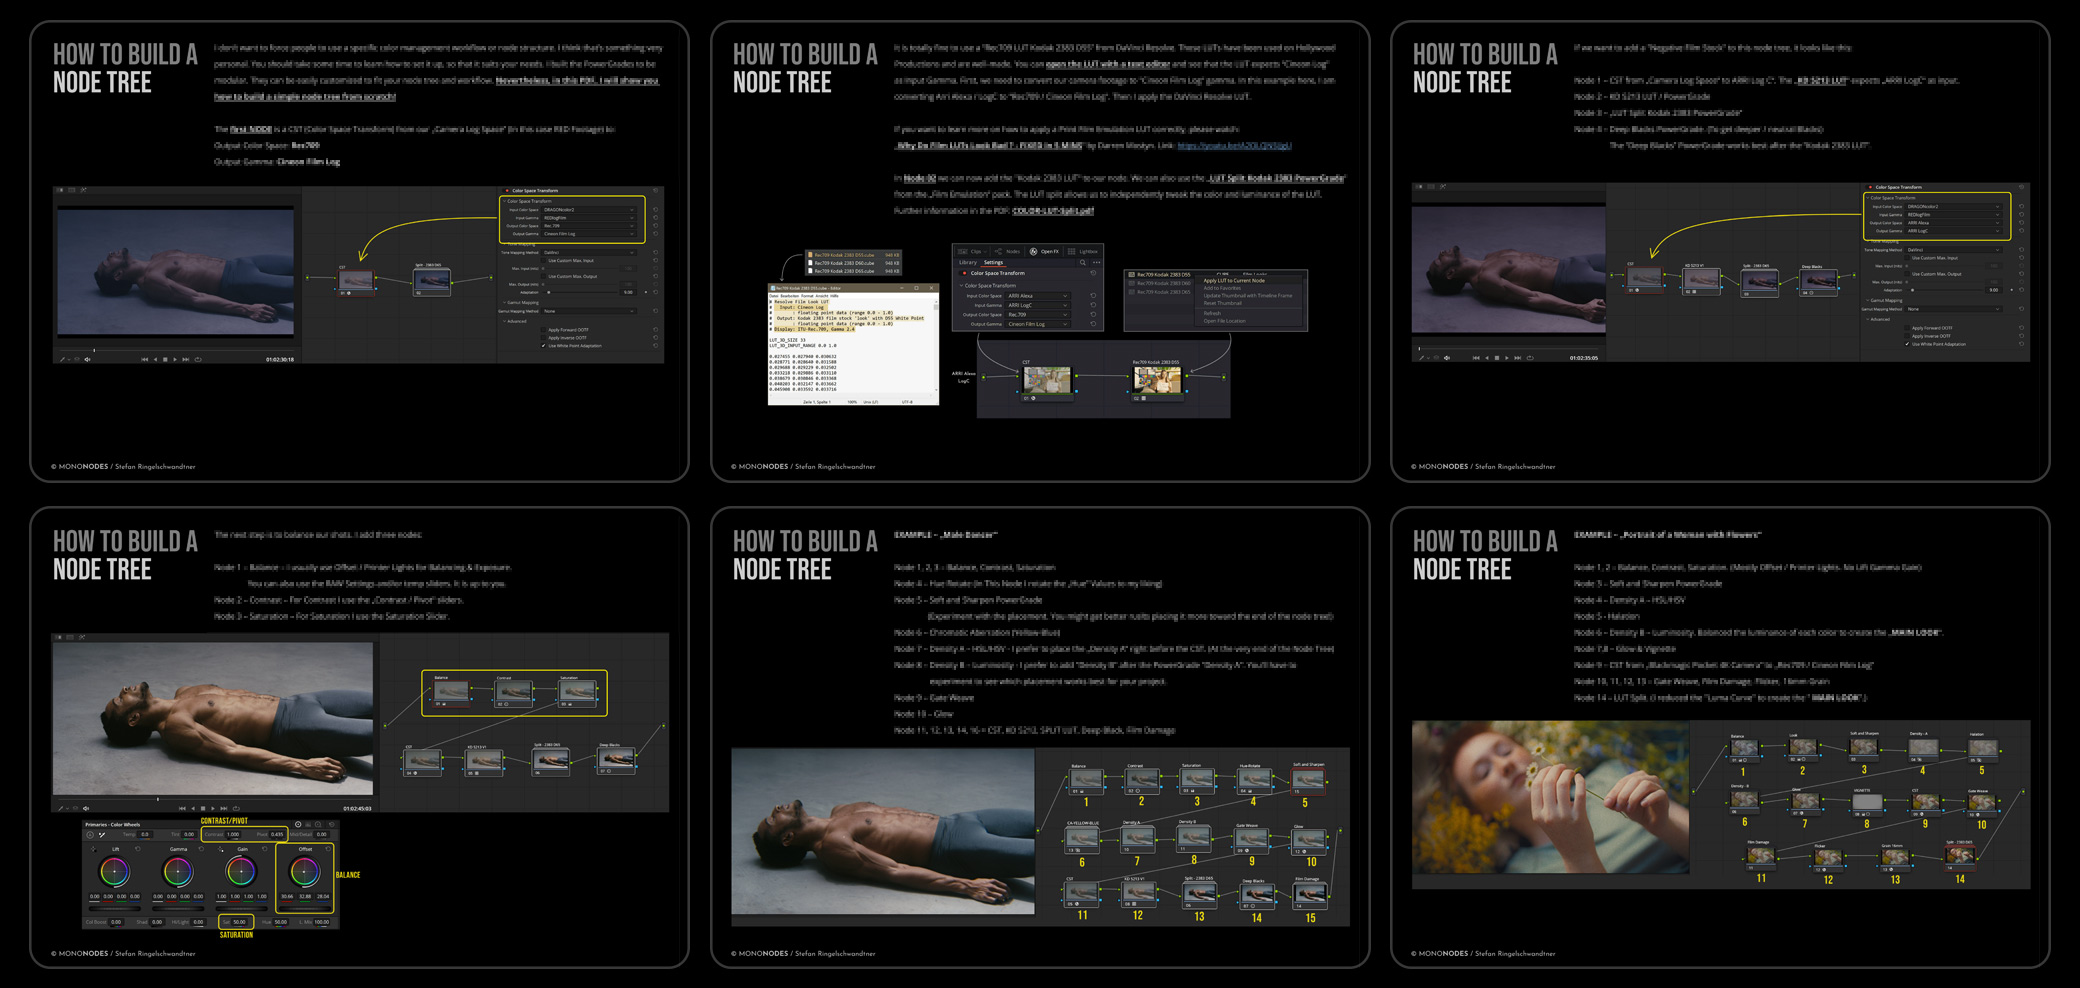
MODULAR
NODE TREE
There are many ways to set up color management in DaVinci Resolve. Darren Mostyn just posted several videos about it. Here he explained a NODE based CST (Color Space Transform) setup. That’s how I also like to work, and my Film Emulation Pack easily integrates into this workflow.
There is no node tree in this pack. Only PowerGrades. I don’t want to force people to use a specific color management workflow or node structure. Also, I think it’s something very personal.
You should take some time to learn how to set it up so that it suits your needs. I built the PowerGrades to be modular. They can be easily customized to suit your node tree and workflow. The “Film Emulation” nodes can be easily integrated into a “scene-referred” workflow. More information here.
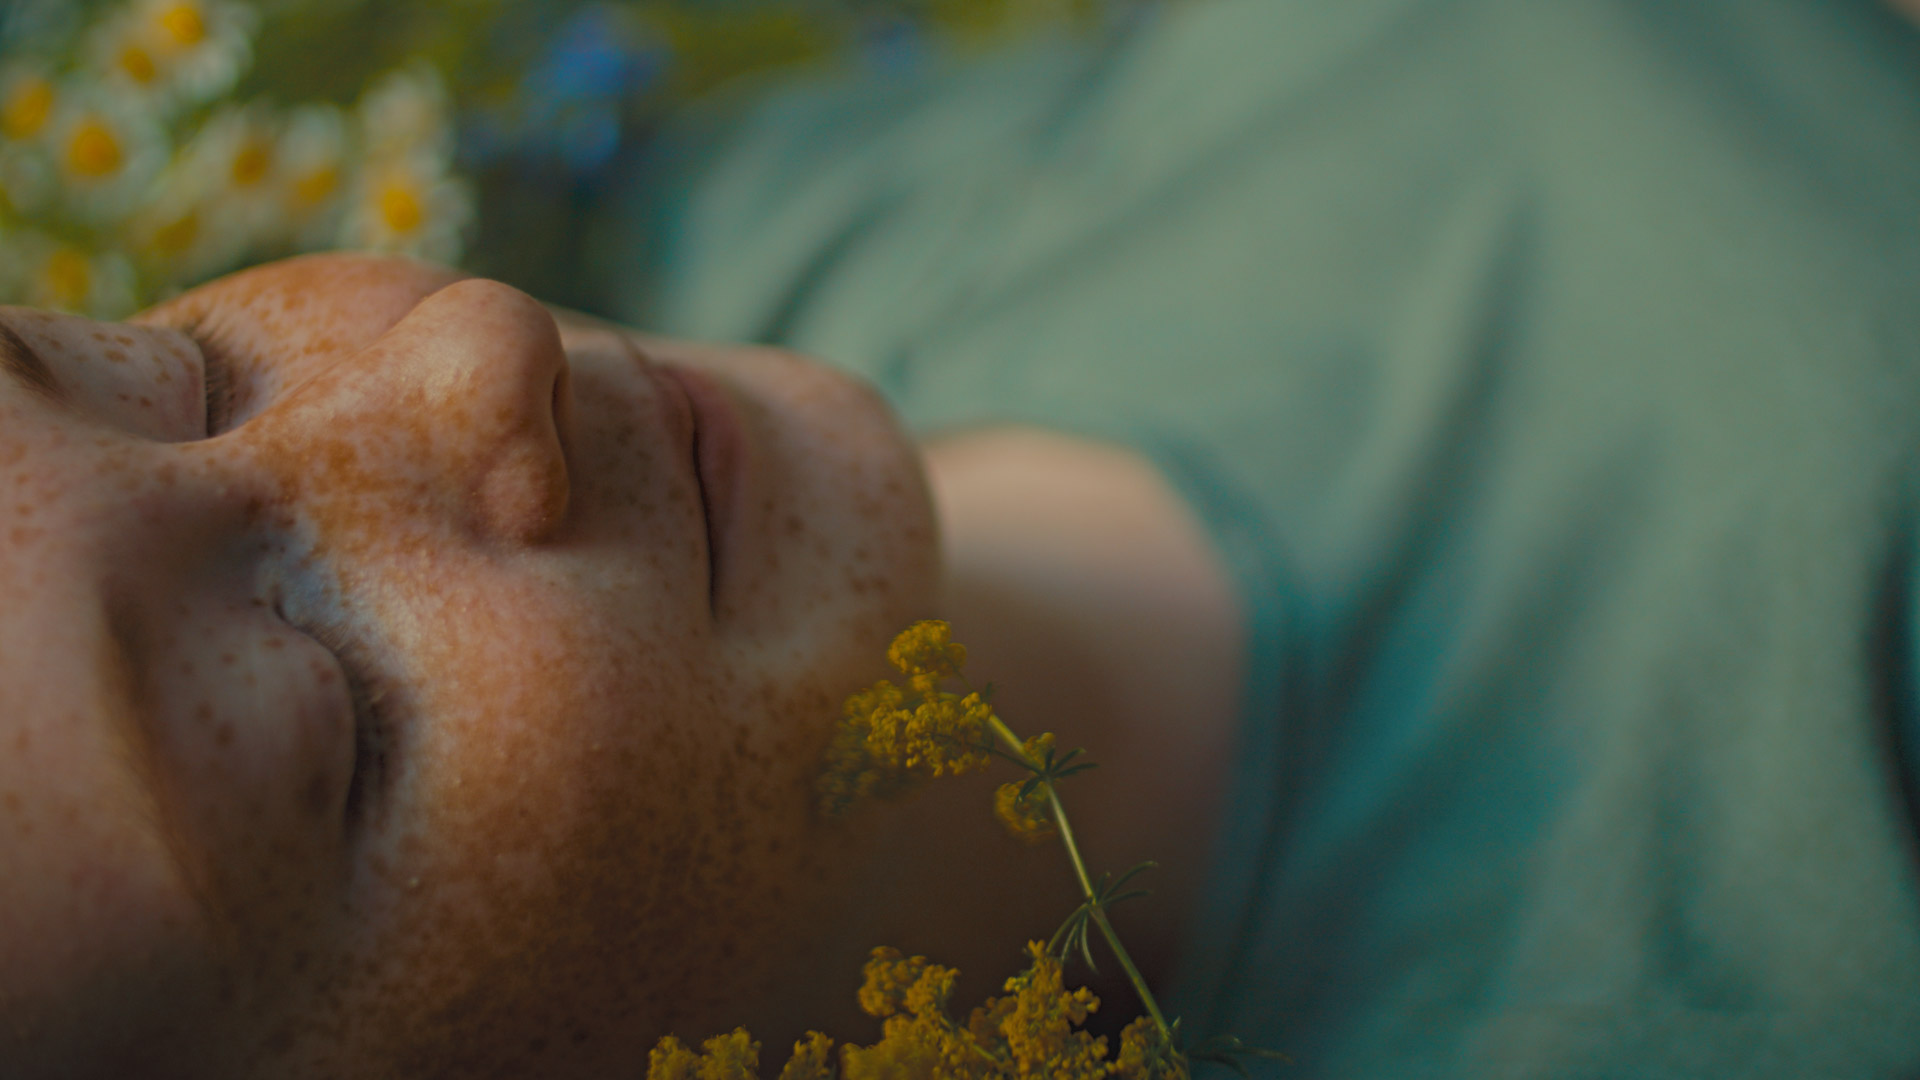
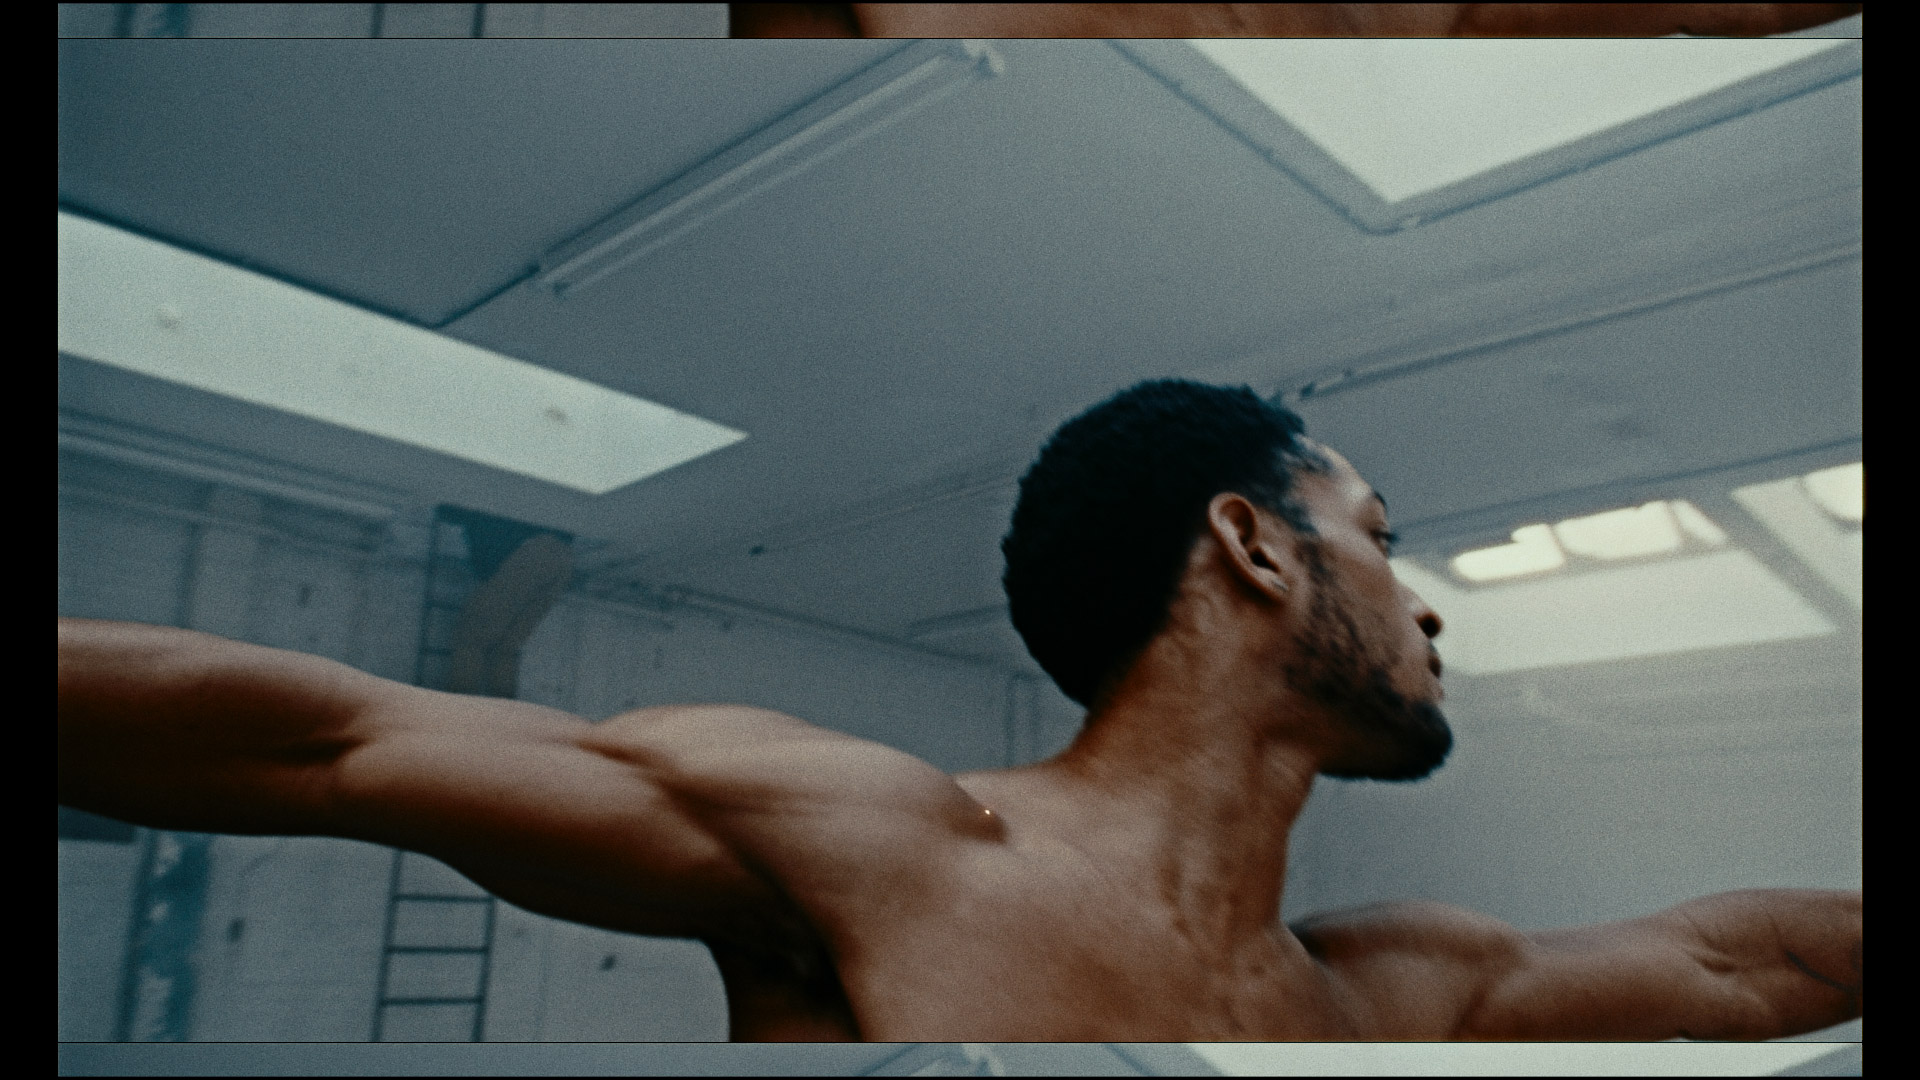
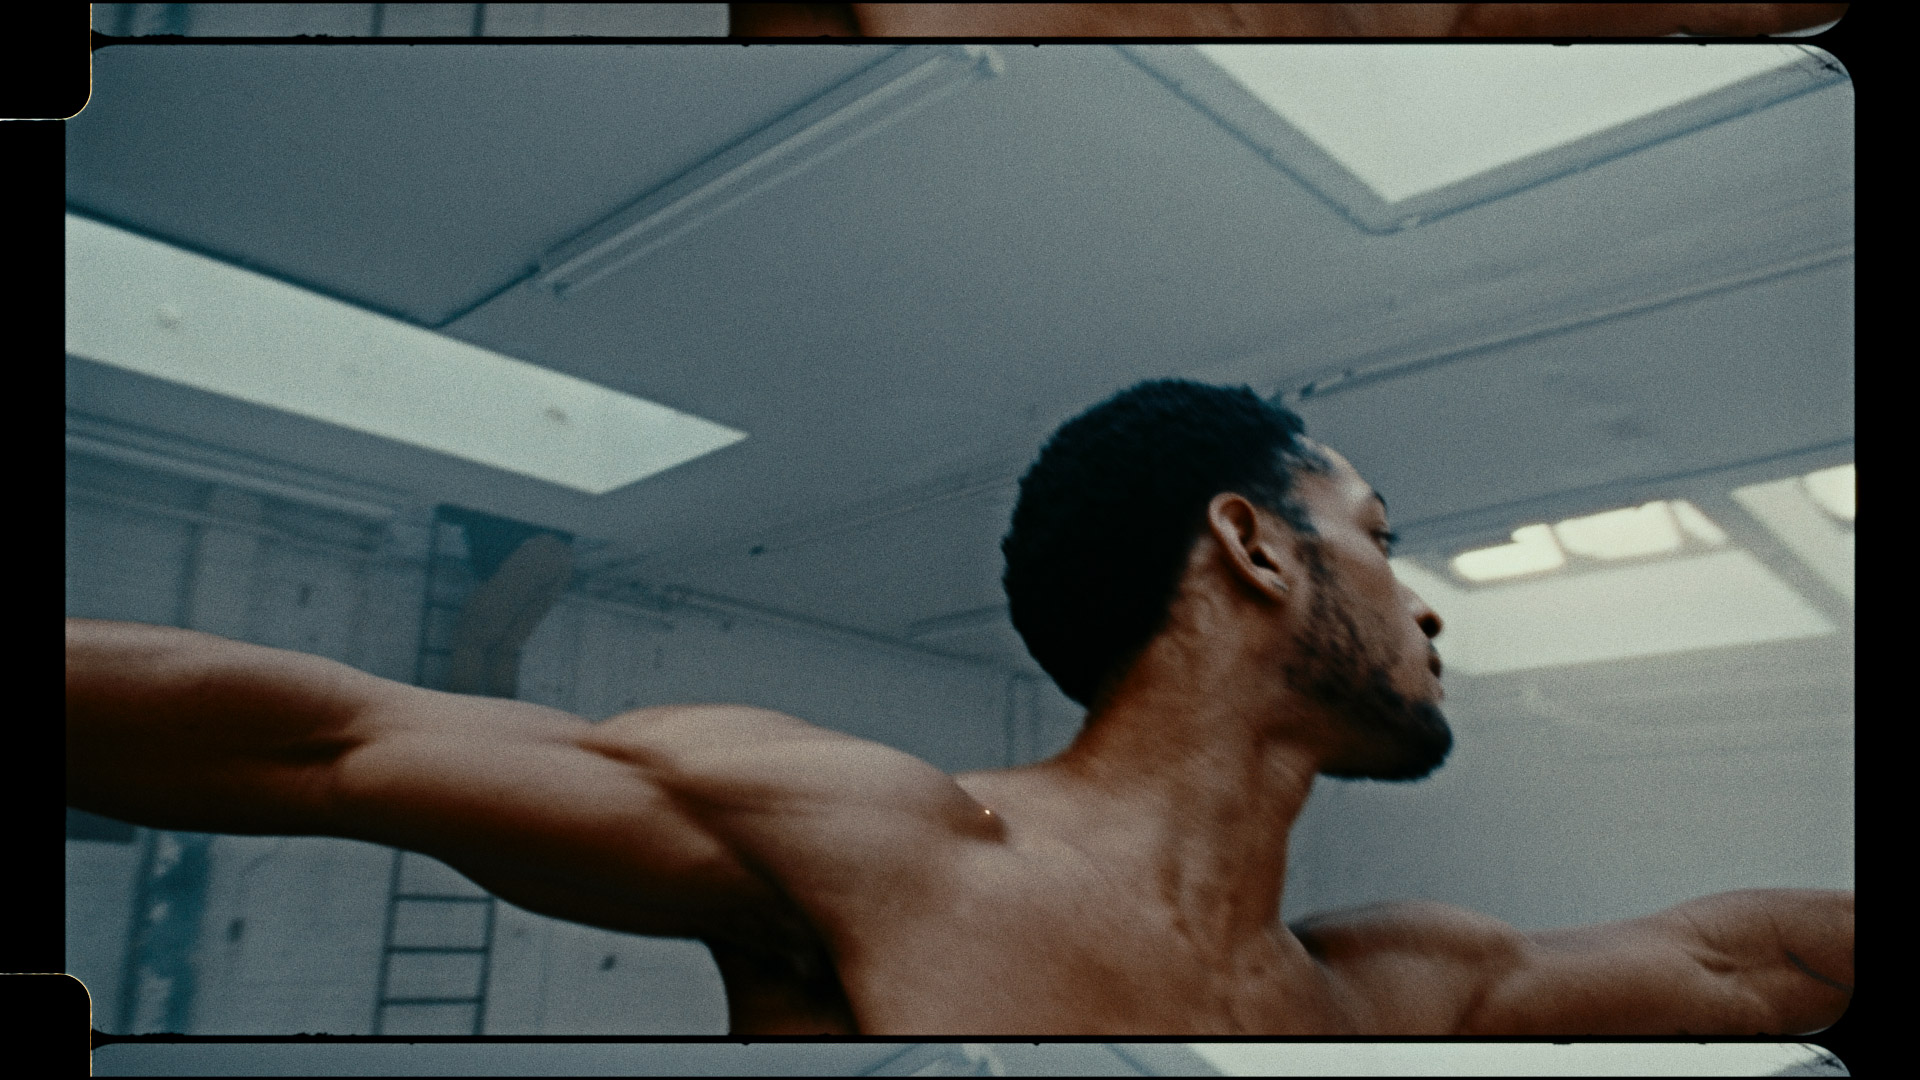
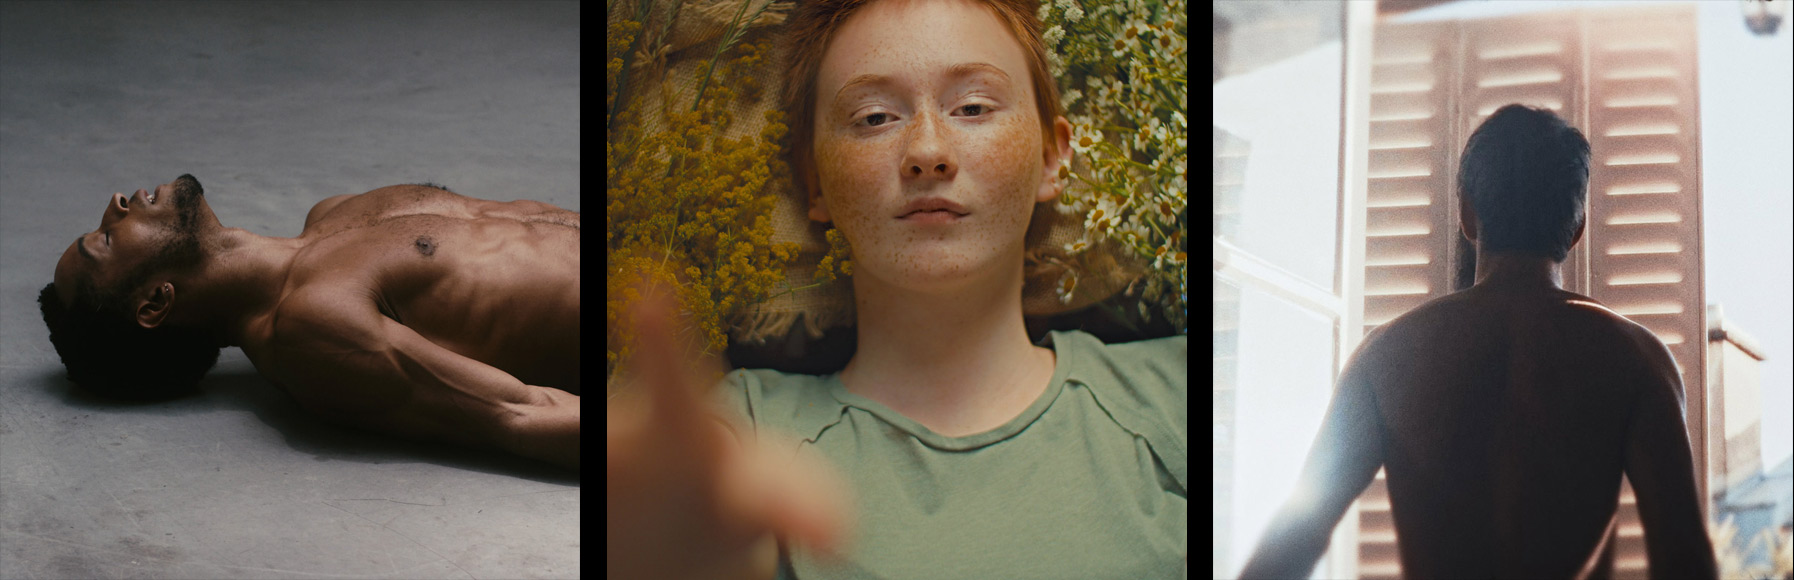
Nevertheless, I’ve included a PDF with this package showing how to create a simple node tree from scratch. With additional information about the node tree for my short films: “Male Dancer” and “Portrait of a Woman with Flowers“.
VIDEO
YouTube: https://youtu.be/4rxcOOACZS8
Vimeo: https://vimeo.com/728460673
BEFORE & AFTER
EXAMPLES
Visit the “EXAMPLES – Film Emulation” page
for some “Before & After” images.
BUY
-
 € 99,00
incl. 19% VAT
SYSTEM REQUIREMENTS
Minimum Requirement:
CPU: Intel Core i7 or AMD Ryzen 7 or M1 / M2 Mac
RAM: 16 GB
GPU: 4 GB VRAM
Recommended Requirement:
CPU: Intel Core i9 or AMD Ryzen 9 or M1 / M2 Mac
RAM: 32 GB
GPU: 8 GB+ VRAM
LUTs & Overlays work well with the free version. But certain PowerGrades like Grain / Lens Distortion and others only work if you have the Studio version, so I recommend using “Film Emulation” with DaVinci Resolve Studio.
Have fun.
If you have any questions / suggestions / comments, feel free
to contact me at stefanATmononodesDOTcom