
FILM DAMAGE GENERATOR
FOR DAVINCI RESOLVE
REFERENCES
Imperfect film scans from feature films, but also from
music videos were mainly my sources of inspiration.
Here are two music videos showing the elements
that I am trying to reproduce:
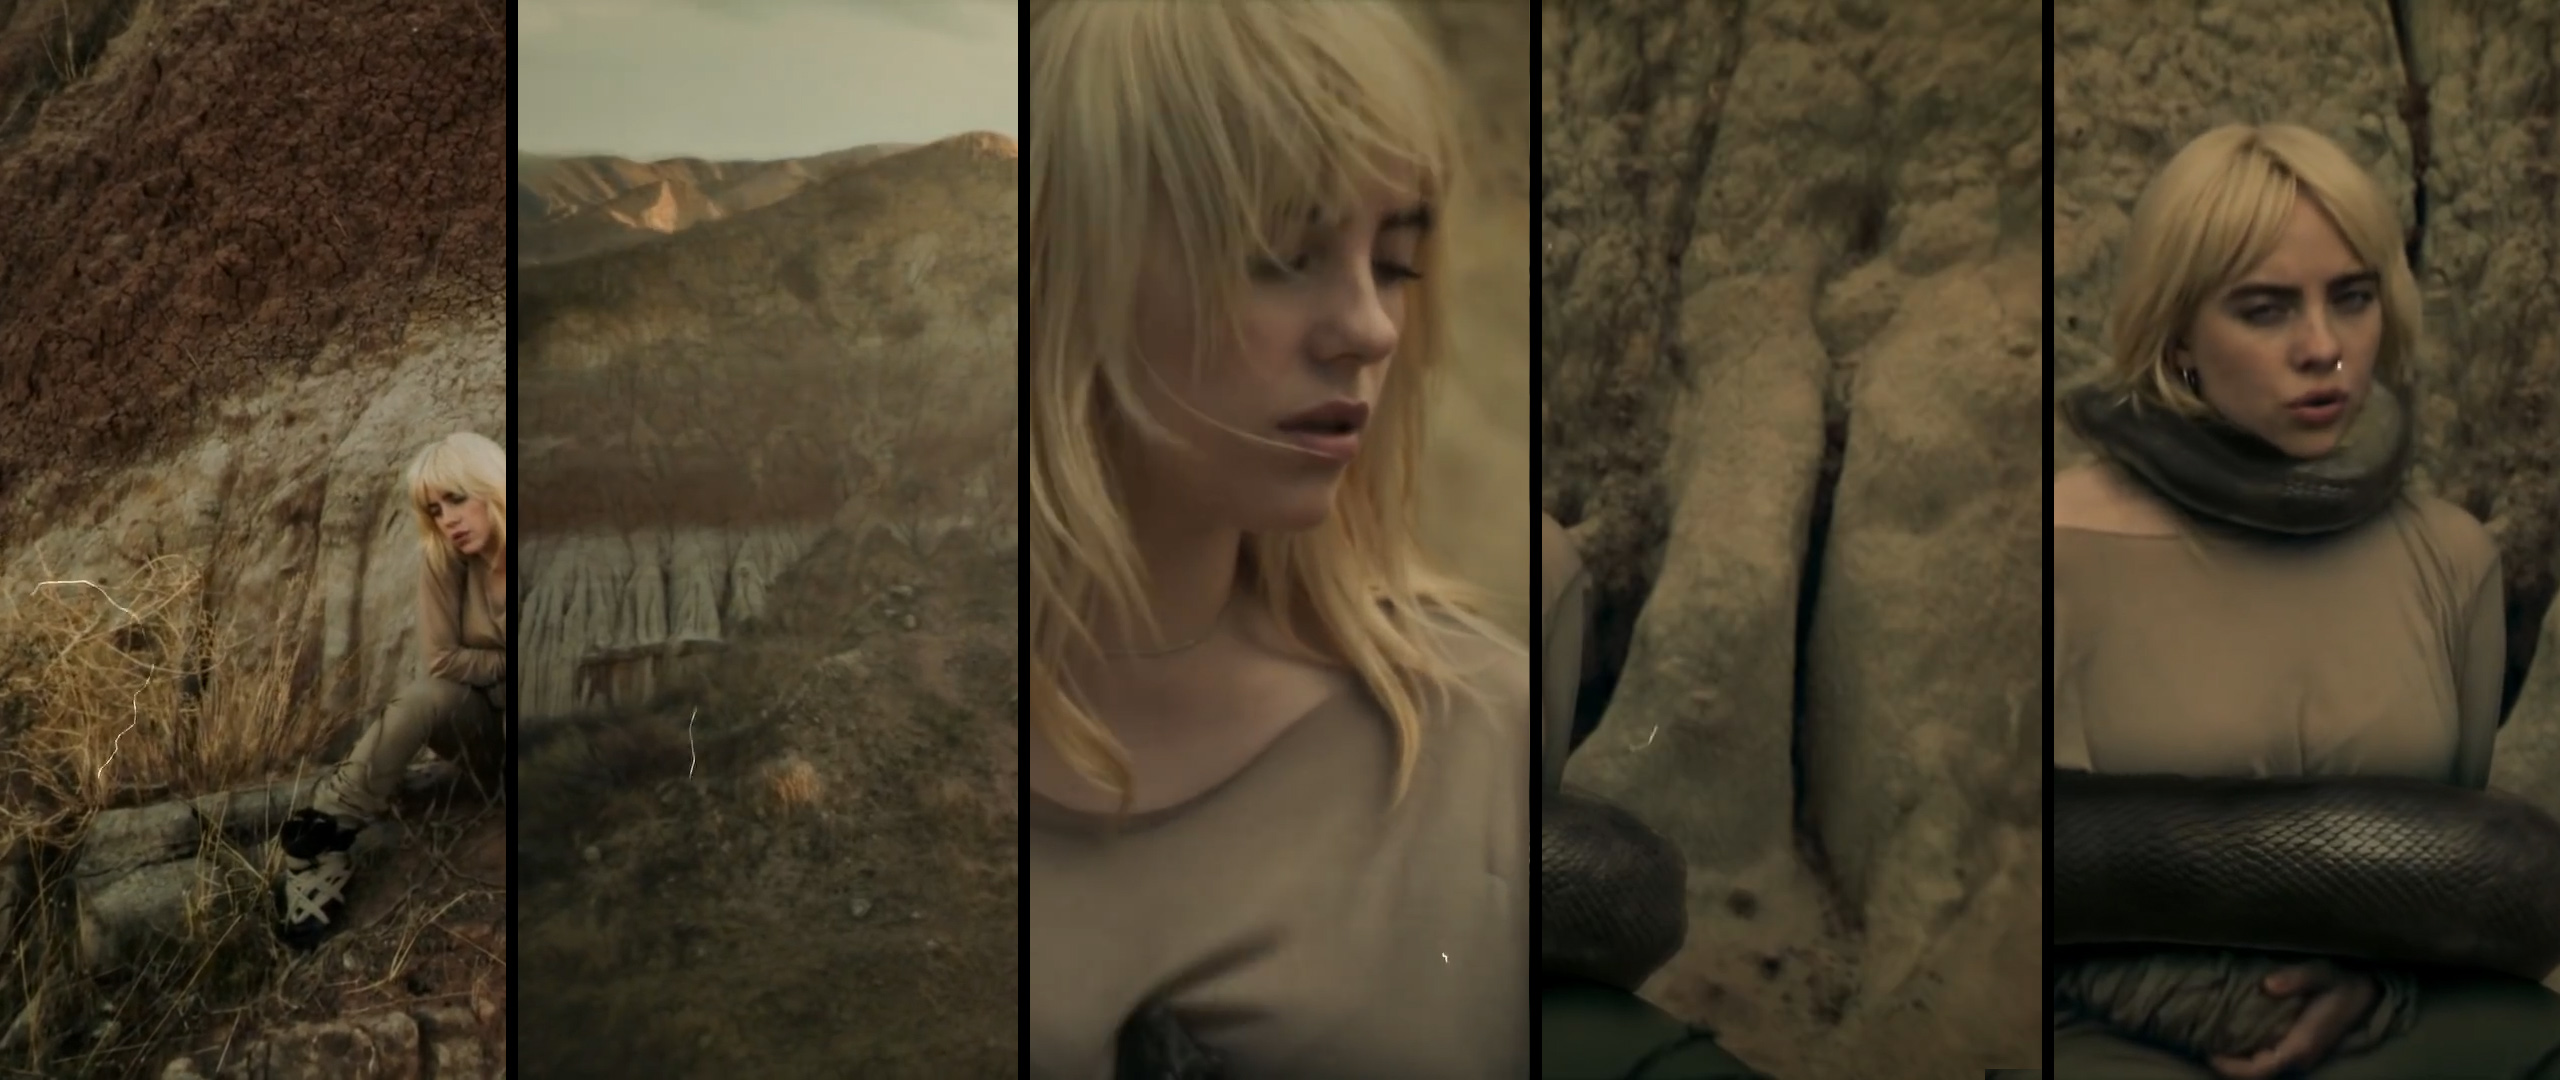

Watch on YouTube:
Billie Eilish – Your Power
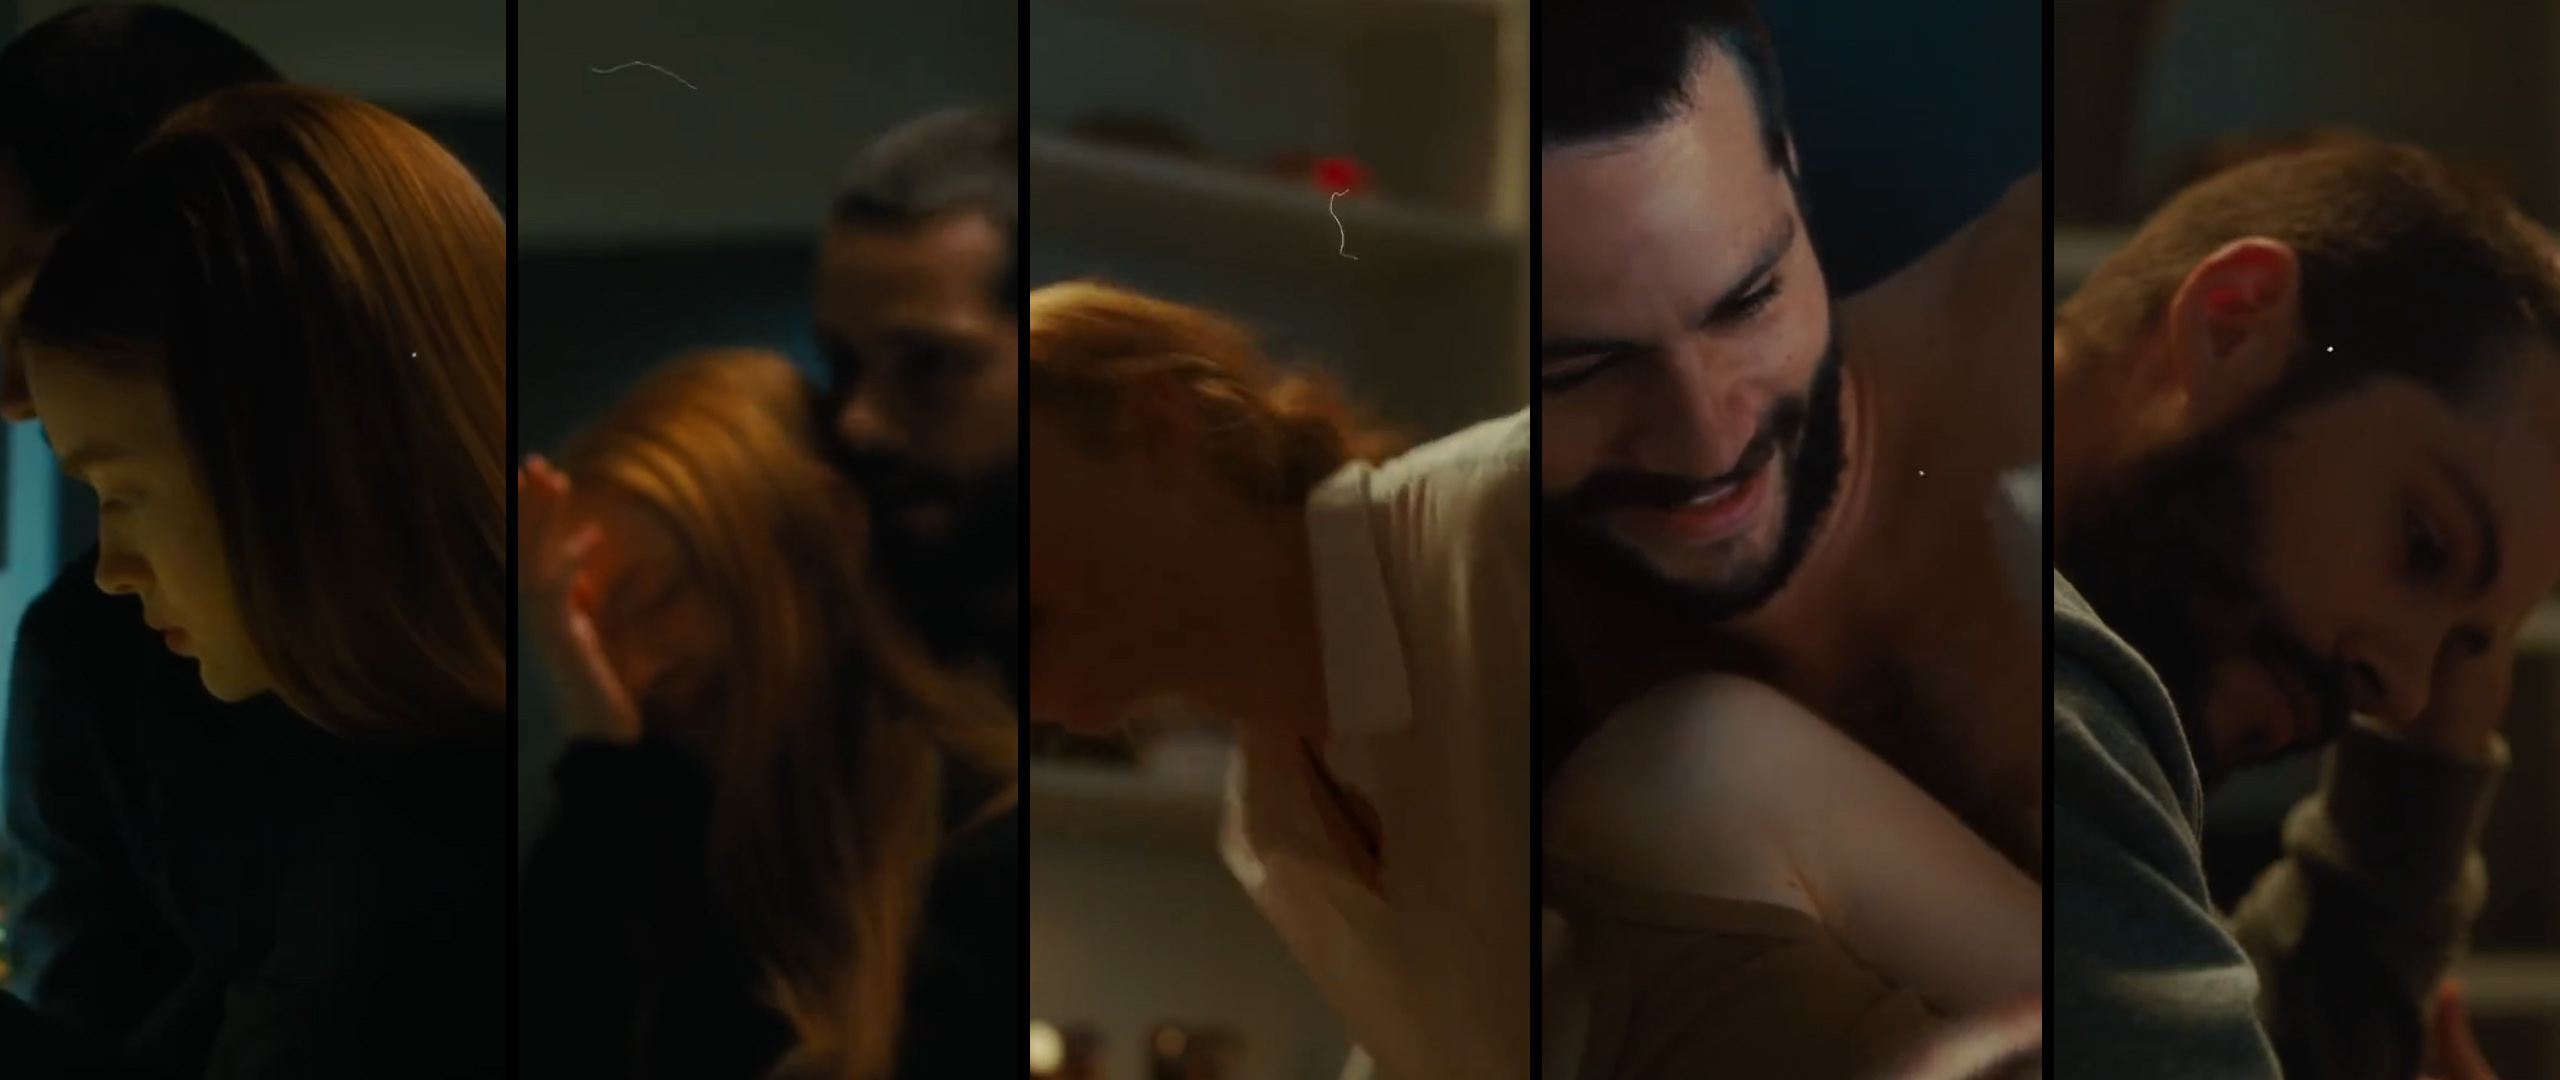
Watch on Vimeo:
Jordan Raf – Scales of St. Michael
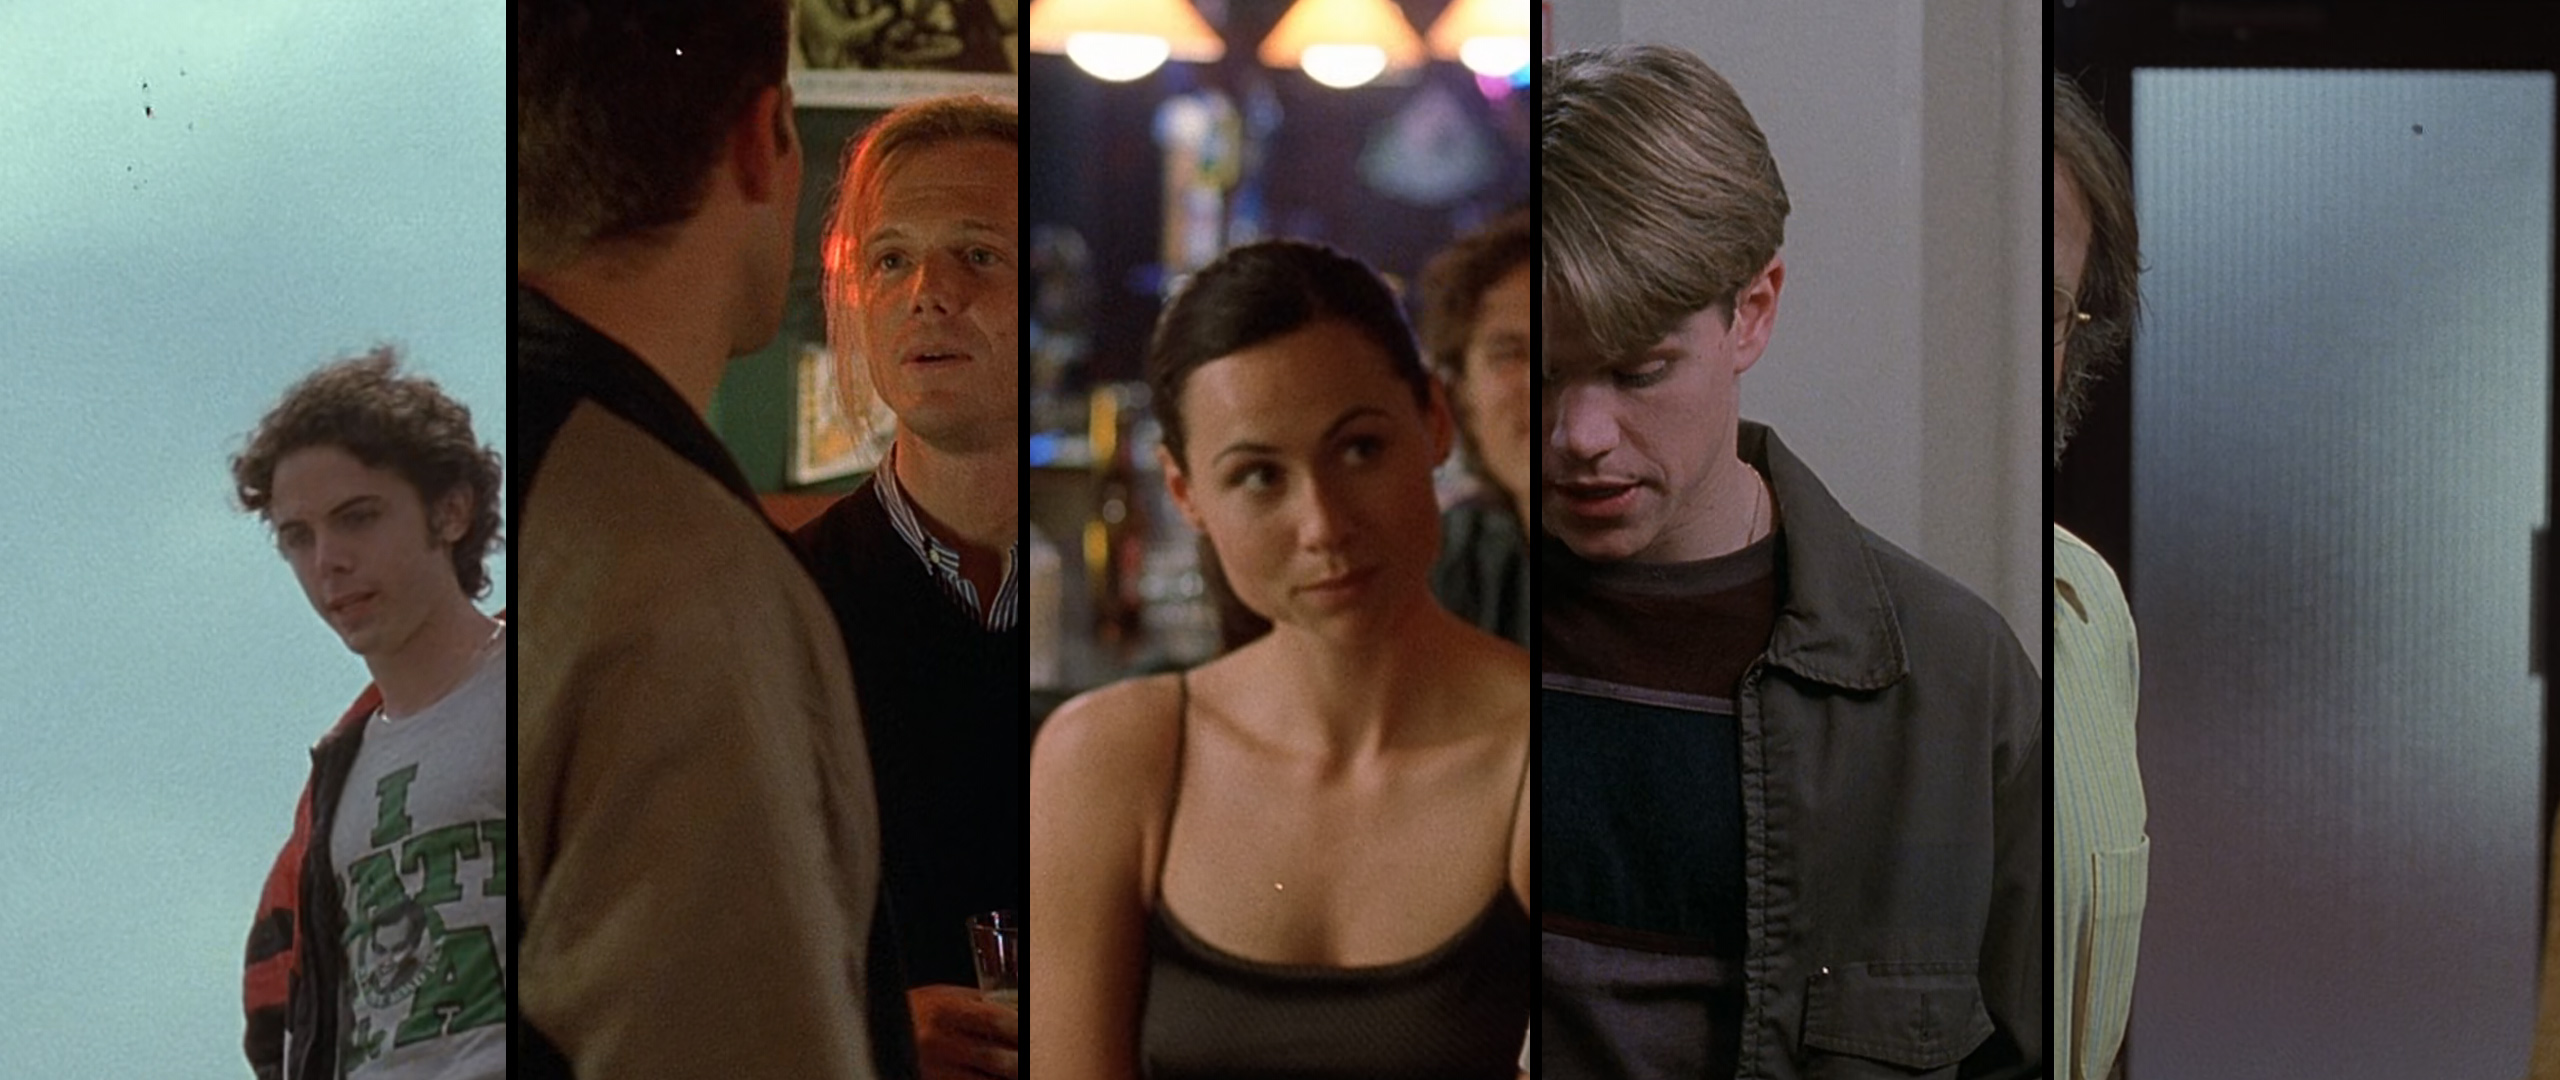
Good Will Hunting (1997)
Directed by Gus Van Sant
© Miramax Films
Watch on YouTube:
Taylor Swift – All Too Well
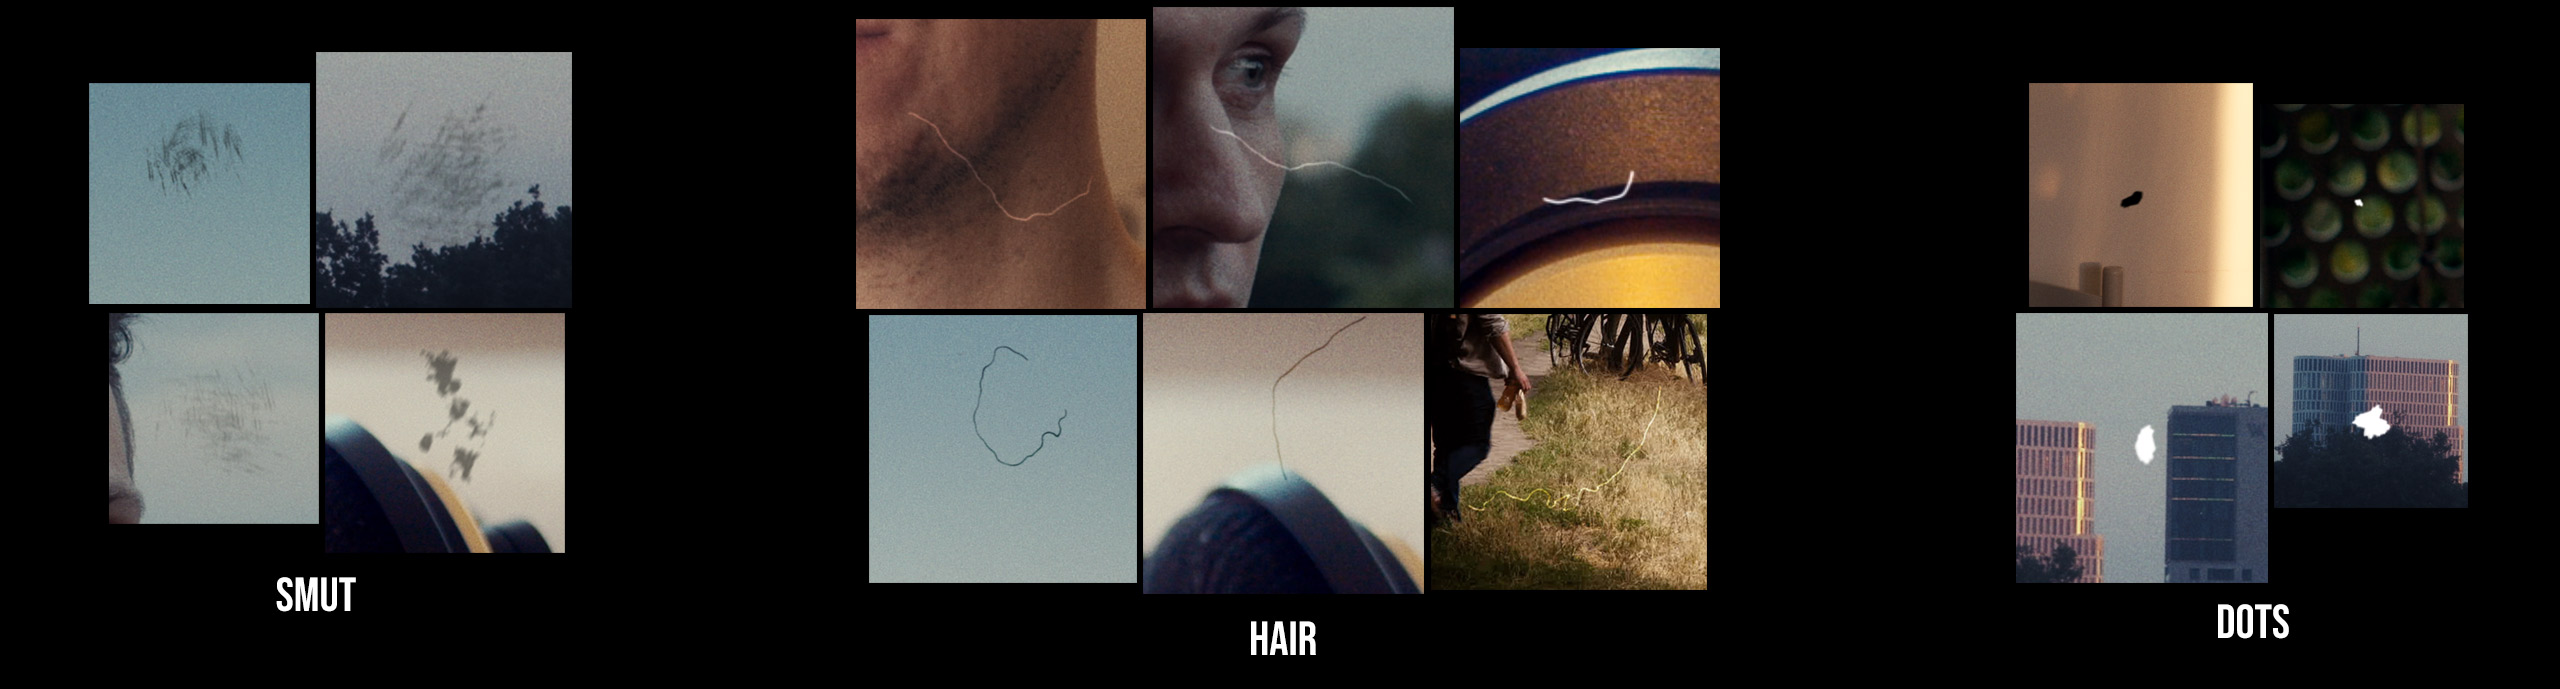
First, I analyzed a lot of real damage and created a database of various elements. In the second step I wrote a computer program that can generate 1000 individual looking “dirt elements” in order to avoid repetitions. So far, I have created the following 3 main elements:
HAIR
REFERENCE
BILLIE EILISH / JORDAN RAF /
QUENTIN TARANTINO
GENERATOR
MONONODES FILM
DAMAGE GENERATOR

DOTS
REFERENCE
W.A.M. BLEAKLEY / BILLIE EILISH /
JORDAN RAF / QUENTIN TARANTINO
GENERATOR
MONONODES FILM
DAMAGE GENERATOR

SCRATCHES / SMUT /
SPRINKLES
REFERENCE
W.A.M. BLEAKLEY /
QUENTIN TARANTINO
GENERATOR
MONONODES FILM
DAMAGE GENERATOR

MY ISSUE
WITH CONVENTIONAL METHODS

“Dirt Overlays”:
– No Control about the amount of Dirt.
– Hair and other Particles are always at the same place.
– Hair and other Particles are tied together.
– Not adjustable in density.
– Often repeats after 10 seconds.

“Film Damage Plugin by DaVinci Resolve”:
– Only “Dust Particles”. No hair, no dots, no scratches or smut.
– Very slow. No real-time playback.
– Bad “density” Controls.
SOLUTION
MONONODES FILM
DAMAGE GENERATOR

– Gives you control about “Hair” size, dot size, smut, sctratches, and so on.
– Gives you control how many frames pauses till the next “dirt” pops up.
– You can add dots, smuts, scratches, sprinkles separately.
– You can change the dirt from white to black or colorize it.
– You can blur single hair and other dirt elements horizontal and vertically.
– You can randomize the location where the dirt appears on the screen.
– Over 3100 PNG files randomized. No repetition.
– You can create your own overlay videos.
– REAL-TIME playback! *
* (Depends on your hardware and how many elements you add and if you are working in a 1080p or 4k timeline.)
3100 PNG FILES
400 x 400 px
Here is an overview about the dirt elements. Some are computer generated (hair / smut), others are painted in Photoshop (dots / scratches / sprinkles).
HAIR
1000 files
SHORT HAIR
500 files

DOTS
200 files
SCRATCHES
200 files
SMUT
200 files
SPRINKLES
200 files

DIRT
200 files
LINT
200 files
SPOTS
200 files
STAIN
200 files

The next step was to create a generator in Fusion that could later be used on the edit page and would give you full control over these dirt elements. This way you can change the composite mode to “Overlay”, change the gain and alpha channel, turn items black, resize and / or blur elements. In addition, it was important to randomize the appearance of the items on the screen. So one of the main functions is in fact randomizing the “on-screen-time” to allow a random number of images to pass before the next element of dirt appears on the screen.
FILM DAMAGE GENERATOR
HOW DOES IT WORK

1. Browse: Select the PNG-Sequence.
2. Loop: Set it “ON”.
3. DIRT Gain: Set it to 0 and the dirt will turn black.
4. DIRT Alpha: Change the transparency.
5. DIRT Size Min: Minimum Size of the selected PNG file.
6. DIRT Size Max: Maximum Size of the selected PNG file.
7. DIRT Angle: Change the angle of the PNG file.
8. Blur Horizontal: Blur the PNG file horizontal.
9. Blur Vertical: Blur the PNG file vertically.
10. Minimum Off time
This one defines the time between a PNG file is visible. If you set it to 100 it takes minimum 100 frames till the next “Dirt PNG file” will be visible.
11. Maximum Off time
If you set this to 200 the Generator chooses a random “Off Time” between 100-200 frames till the next “Dirt PNG file” will show up.
12. Minimum On time
The “on time” defines how many frames from the PNG Sequence will be visible in a row before it goes back into “Off Time”.
13. Maximum On time
This defines how many “Dirt PNG files” will be shown after another till it switch back to “Off time”.
14. Smoothness
defines where the “Dirt PNG files” appear after each other. If it is set to 0.001 the PNG files appear “randomly”. If it is set up to 25 the “PNG files” will “float” in a smooth pattern over the screen.
15. 1080p (1.0) / 4k (2.0)
Per default, it is set to up for a 1080p composition. If you are working on a 4k timeline, set the slider to 2.0.
EXAMPLES
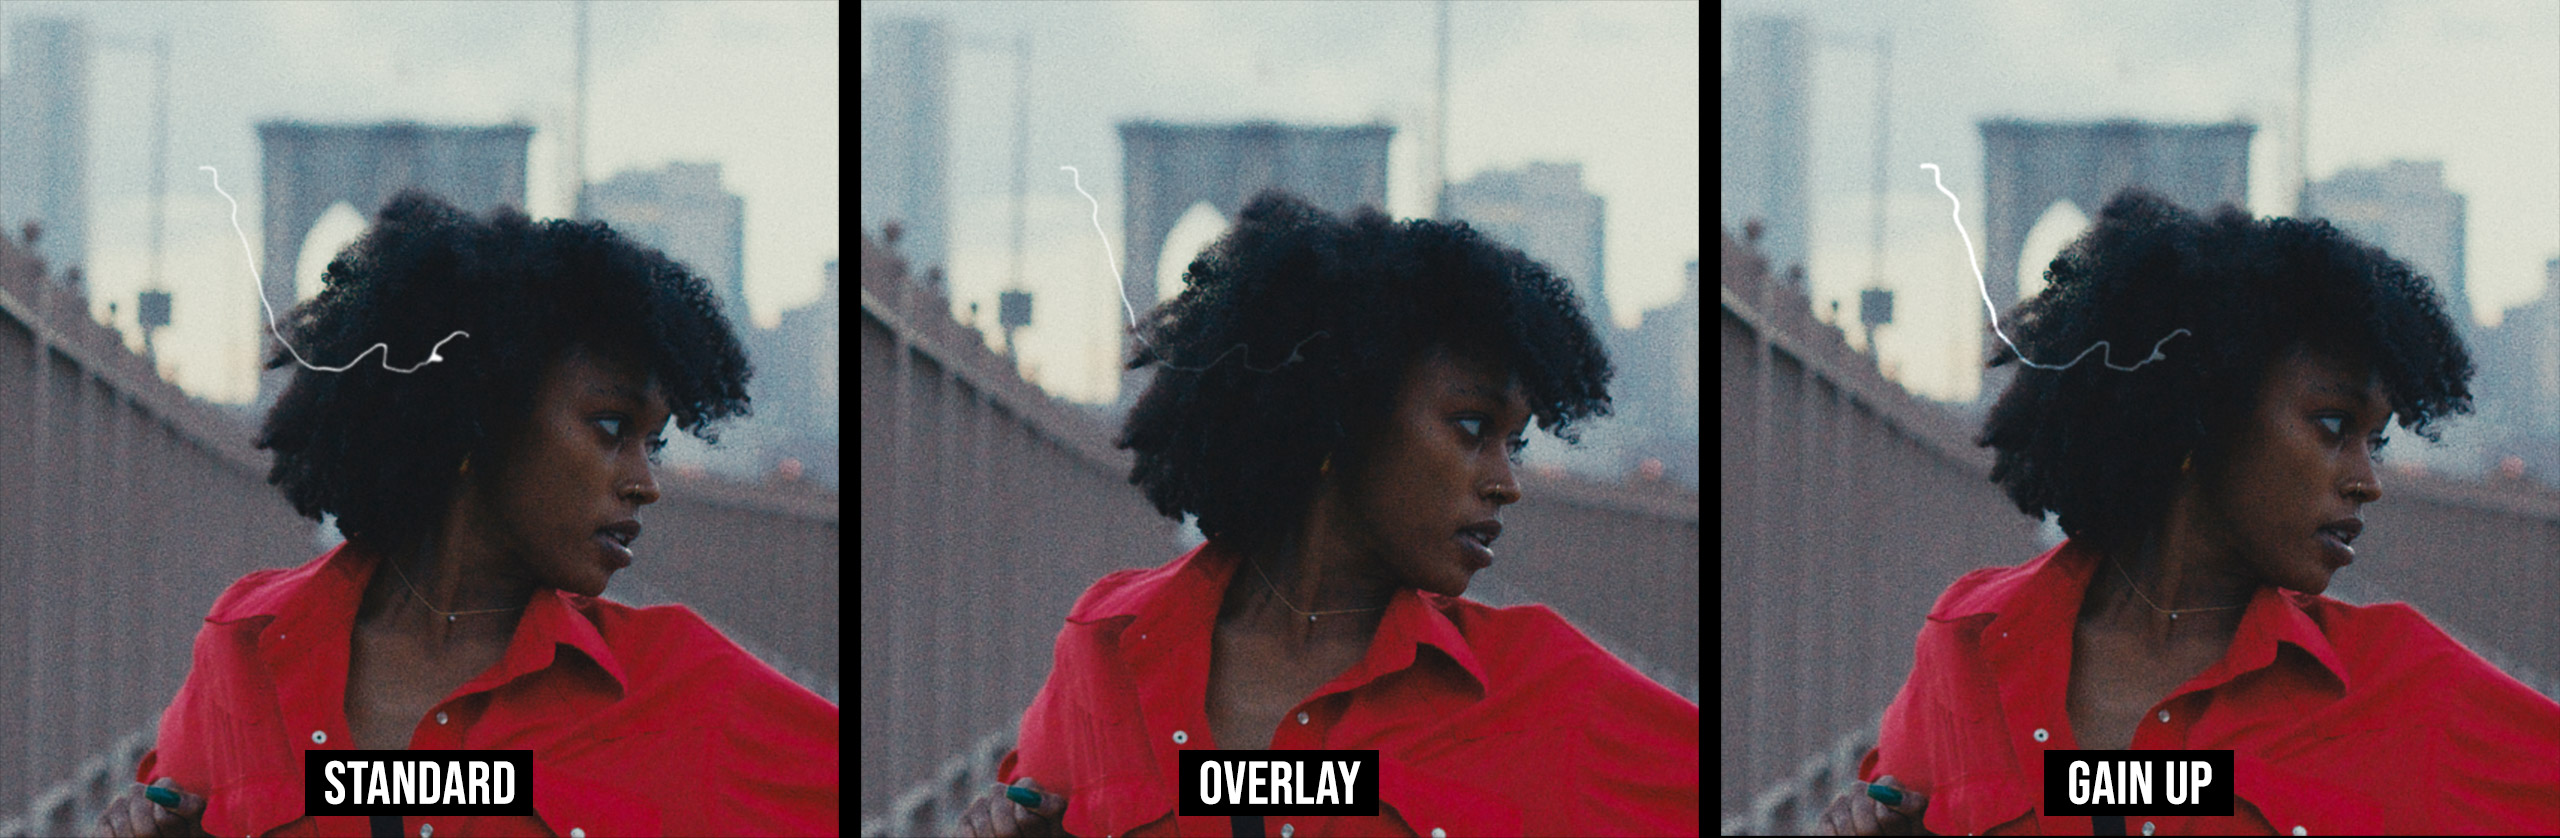

HAIR – Various types of overlay & gain modifications
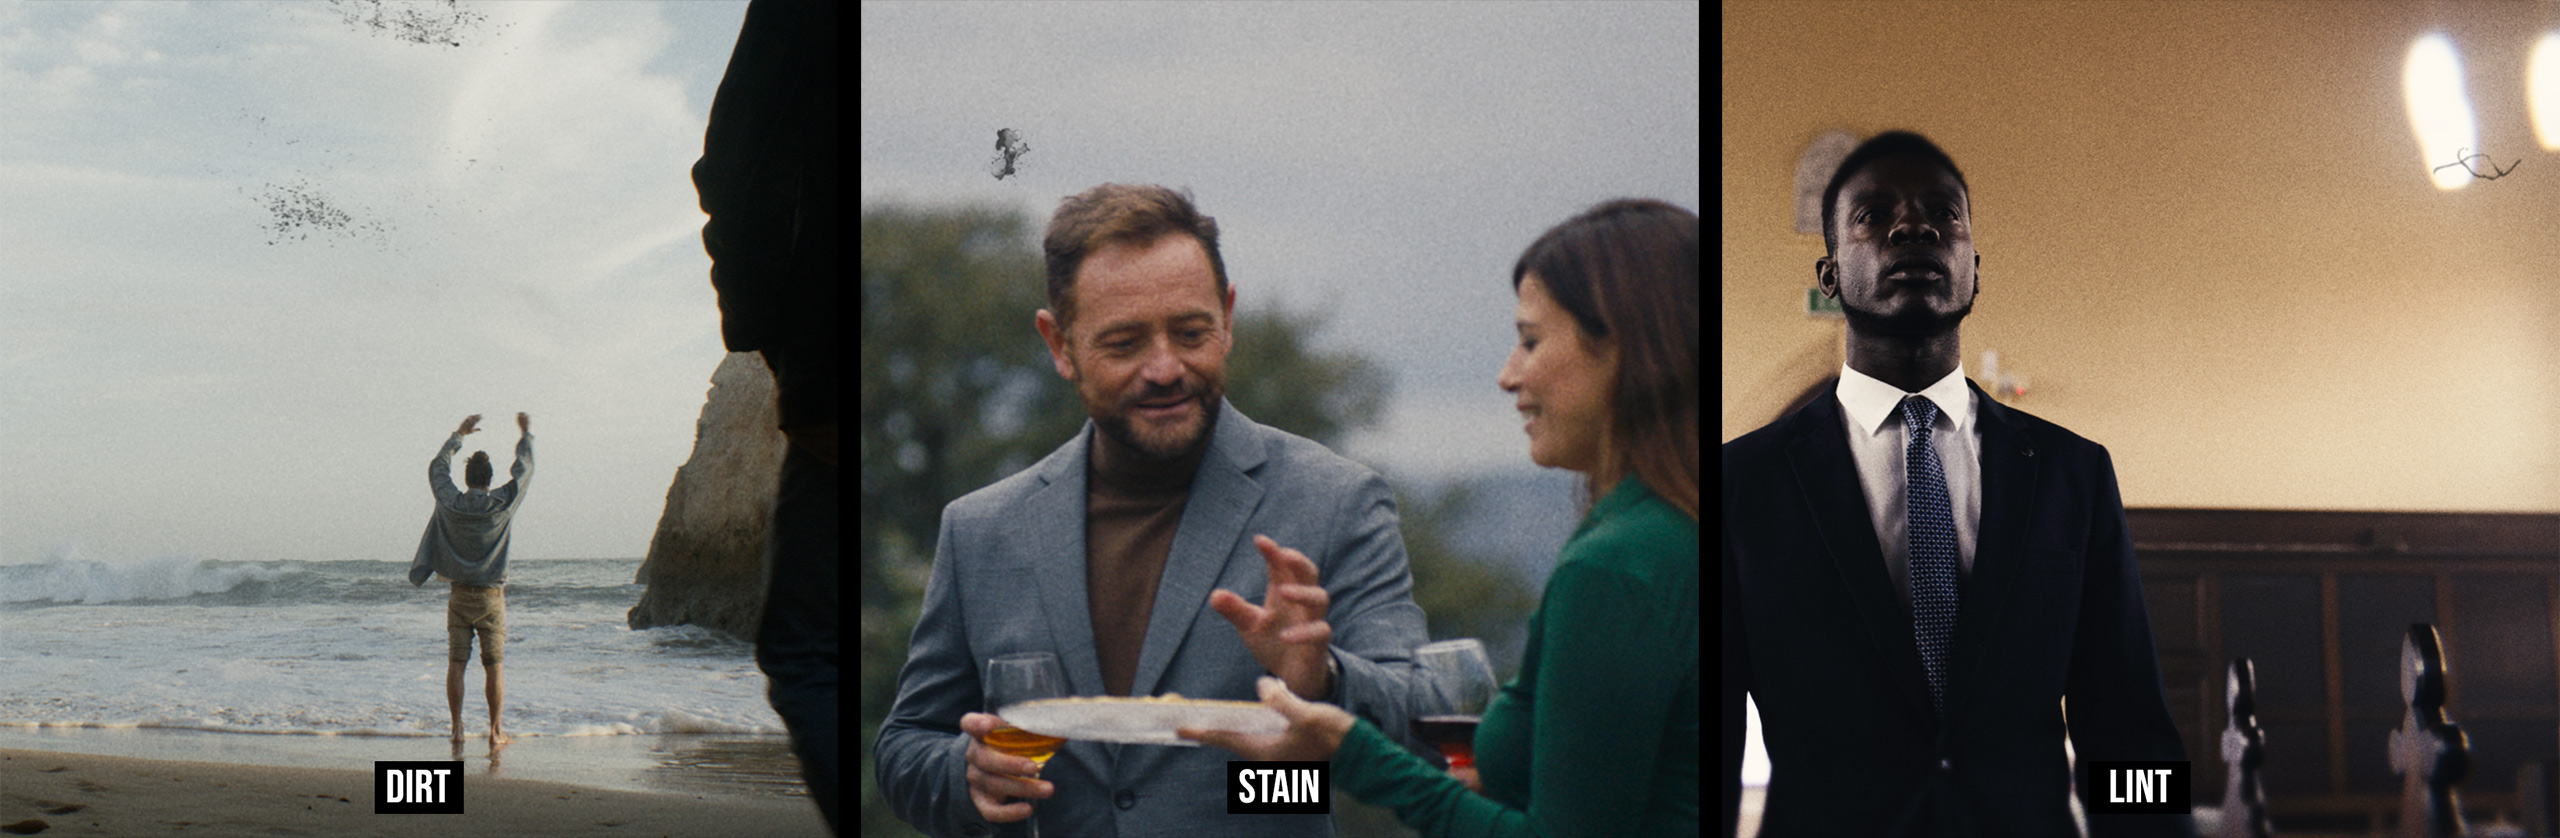
DIRT / STAIN / LINT
HOW TO INSTALL
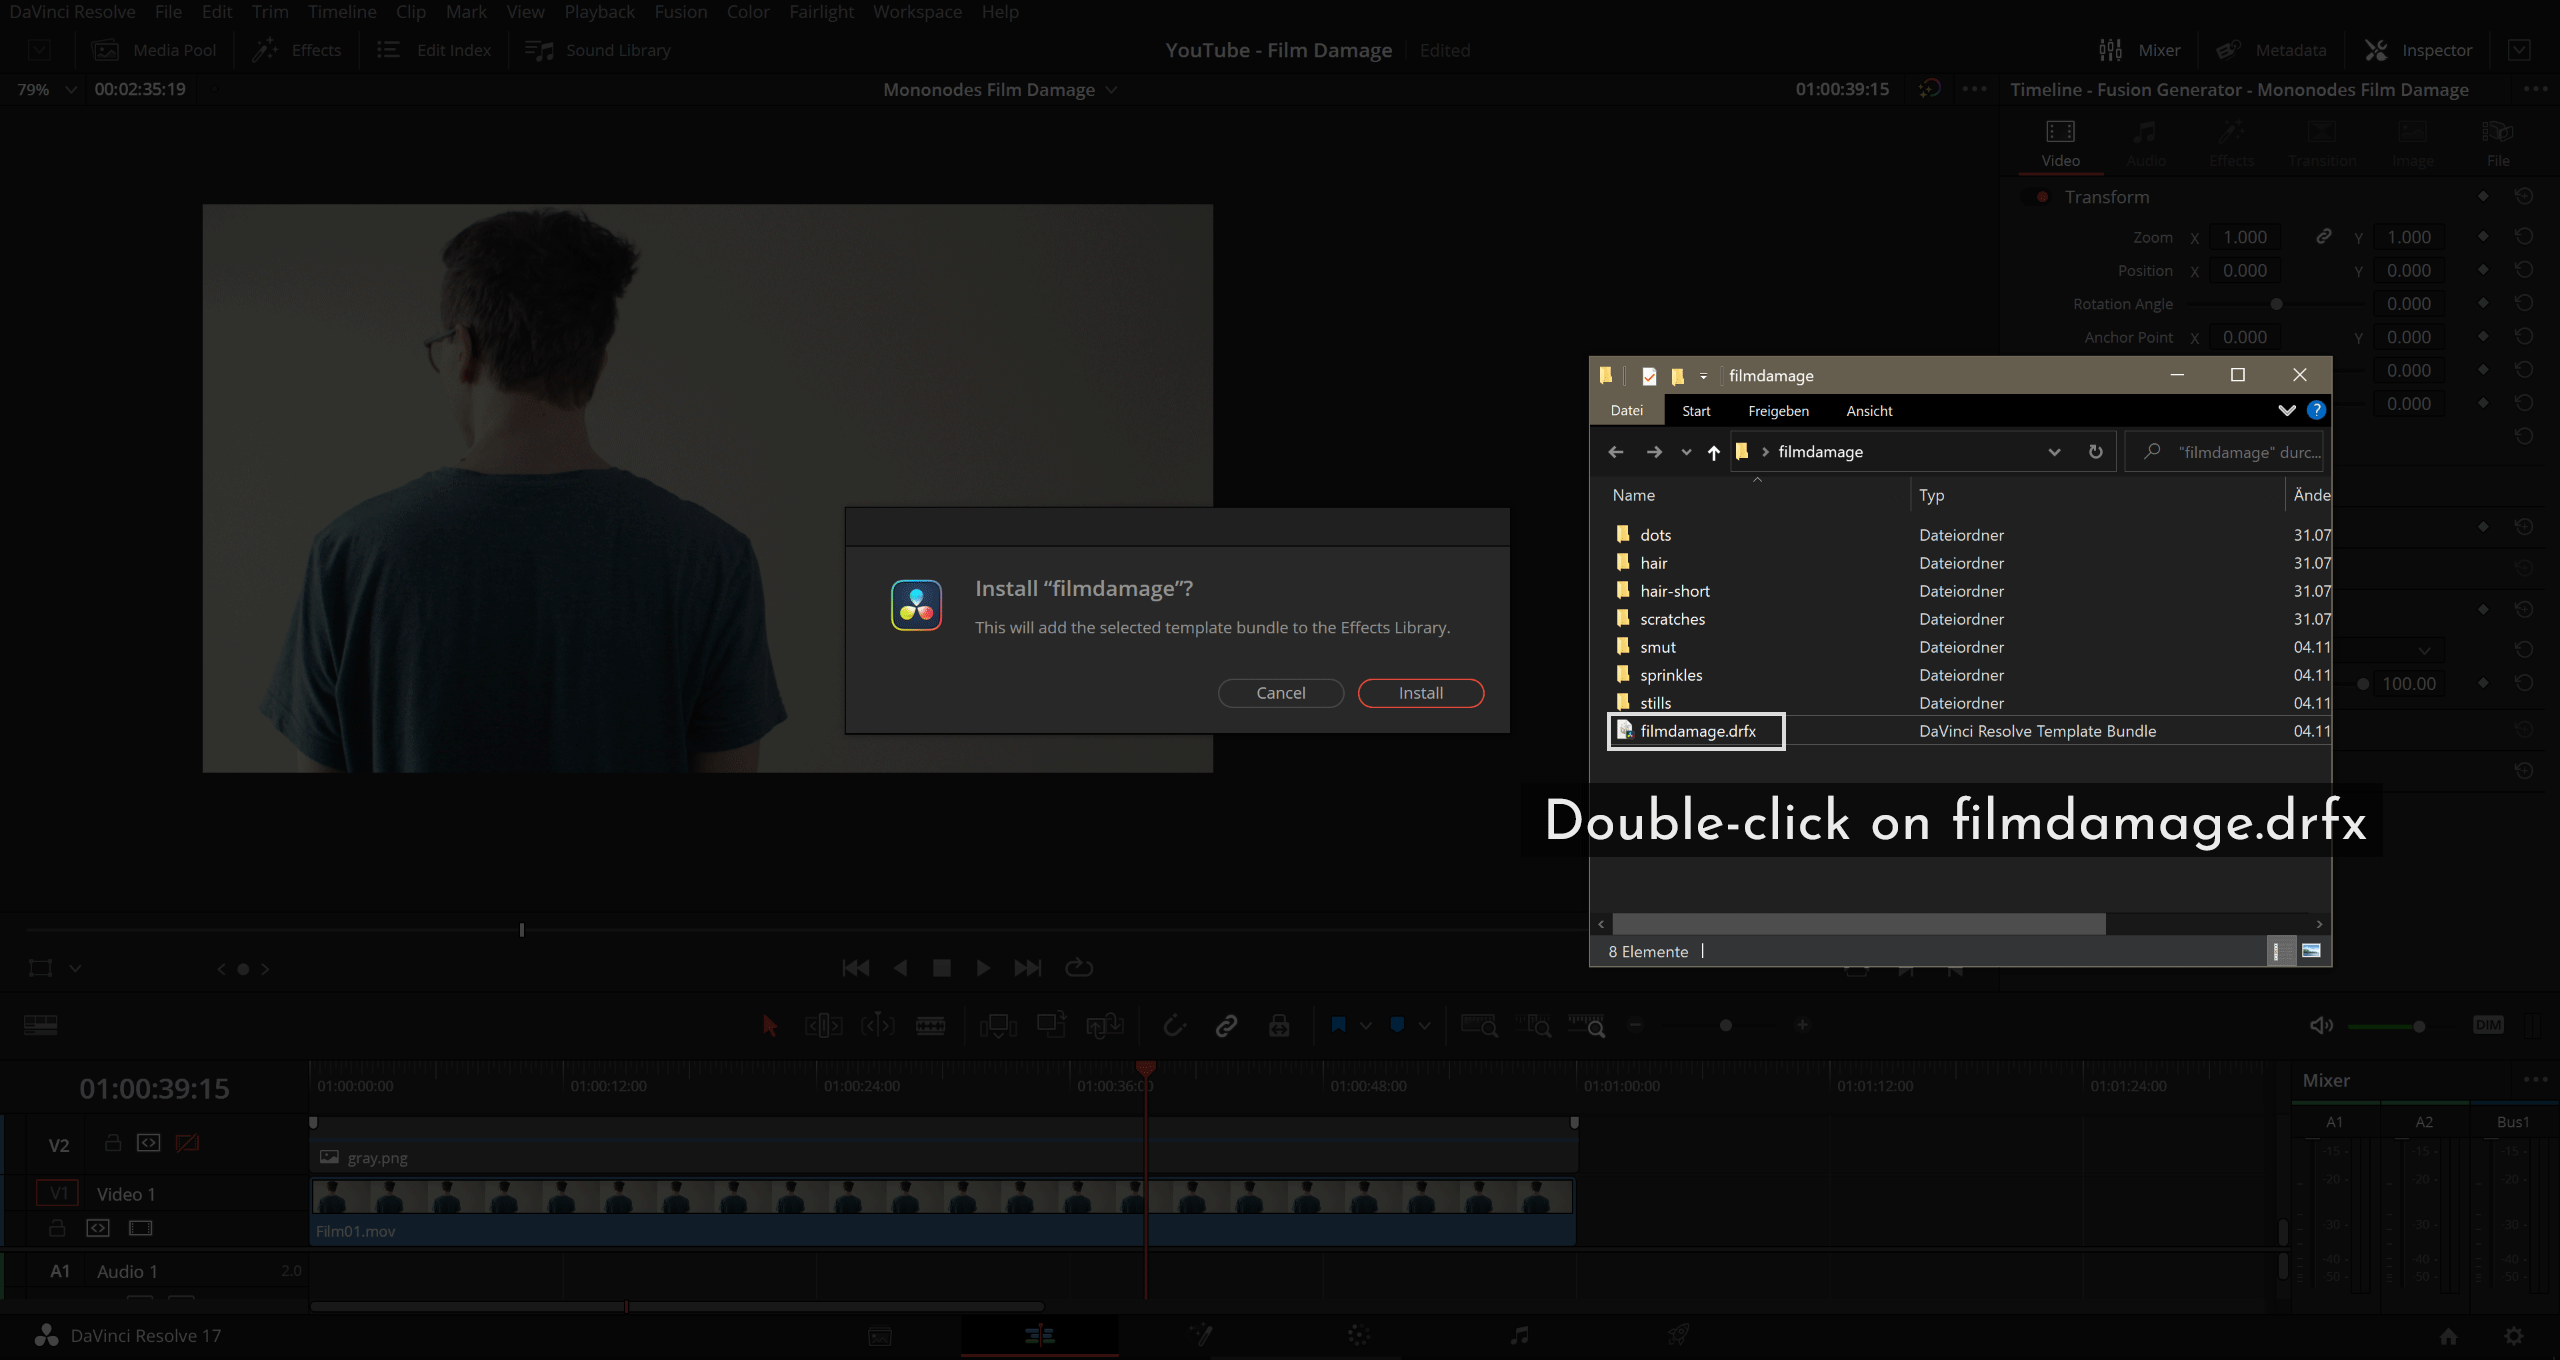

1. Download the ZIP file and extract the ZIP file.
2. Open DaVinci Resolve. Double-click on filmdamage.drfx. Click “Install”. Restart DaVinci Resolve.
3. Go to the EDIT Page, open the “Effects Library”. Go to “Fusion Generators” and drag and drop the “Mononodes Film Damage” onto your Timeline.
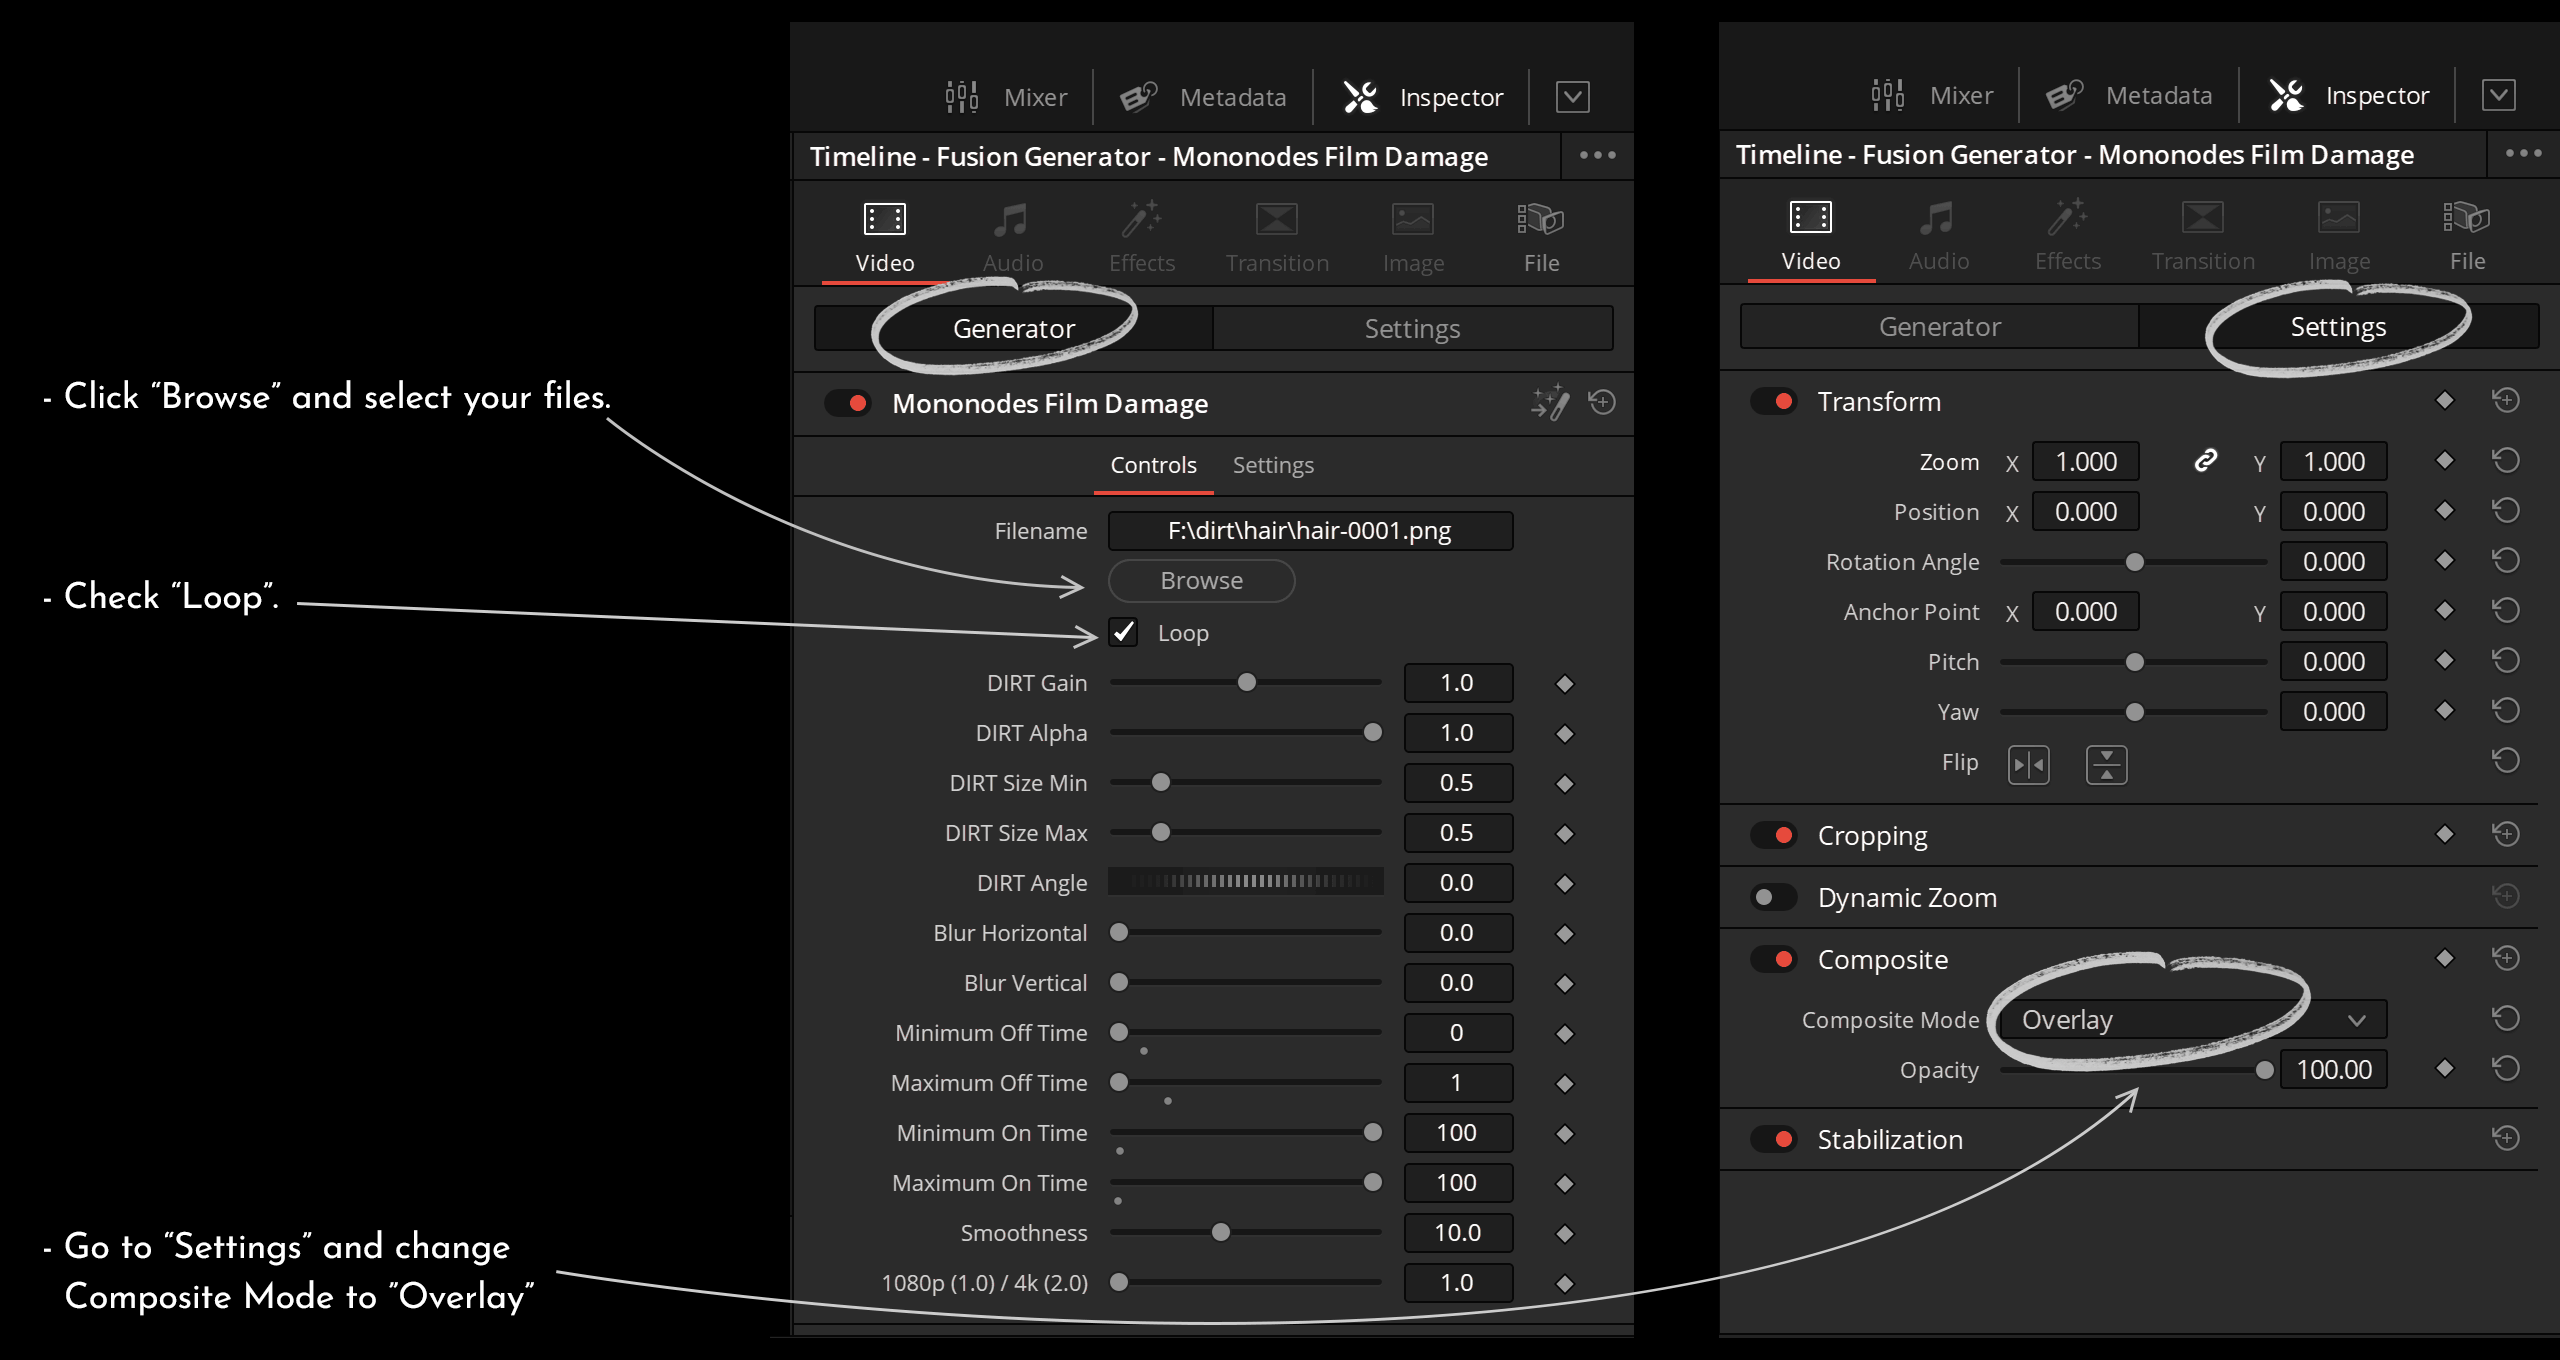
4. In the “Inspector” click “browse” and select the first “Dirt PNG file”. For example: “hair-0001.png” or “dots-0001.png”.
5. Check that “Loop” is ON. (very important)
6. In Settings, you might want to change the Composite Mode to “Overlay“.
INSTALL LOCATIONS
Resolve will automatically “install” the .drfx file in these locations:
On macOS: Macintosh HD/Users/username/Library/Application Support/Blackmagic Design/DaVinci Resolve/Fusion/Templates/
On Windows: C:\Users\username\AppData\Roaming\Blackmagic Design\DaVinci Resolve\Support\Fusion\Templates\
On Linux: home/username/.local/share/DaVinciResolve/Fusion/Templates/
HOW TO UNINSTALL
1. Navigate to the appropriate template
directory in your file browser.
2. Delete the “filmdamage.drfx” file.
PREVIEW
HERE SOME TEST FOOTAGE WITH
FILM DAMAGE APPLIED TO IT.
Vimeo: https://vimeo.com/577742067
YouTube: https://youtu.be/knYcM9SUOyM
BUY
-
 € 179,00
incl. 19% VAT
SYSTEM REQUIREMENTS
Minimum Requirement:
CPU: Intel Core i7 or AMD Ryzen 7
RAM: 16 GB
GPU: 4 GB VRAM
Recommended Requirement:
CPU: Intel Core i9 or AMD Ryzen 9
RAM: 32 GB
GPU: 8 GB+ VRAM
To install “.drfx” Bundles you will need
DaVinci Resolve 17.2. Free or Studio Version.
Lightweight:
filmdamage.drfx is only 9 kilobytes in size.
KNOWN BUGS
If you have selected your PNG folder (e.g. hair) and later want to switch to a different PNG folder, DaVinci Resolve may close automatically. I suggest not to change the directory and switch to a different PNG sequence after changes have been made in the Generator.
VIDEO
Vimeo: https://vimeo.com/643261832
YouTube: https://youtu.be/FMpsuDT7SkQ
REWIEW BY STARMILK
Youtube: https://youtu.be/lR4bN6rvDSg
Video by STARMILK
Have fun.
If you have any questions or need support, feel free
to contact me at stefanATmononodesDOTcom