CLAMP DCTL
INTRODUCTION
Working with HSV and other color models in DaVinci Resolve can present unique challenges. One common issue is the extension of RGB values beyond their standard range, which occurs due to DaVinci Resolve’s handling of a significant dynamic range within a floating-point space. This allows color values to exceed the typical 0-1 range without being clipped, retaining detail in both shadows and highlights.
ADDRESSING BLACK PIXEL ISSUES
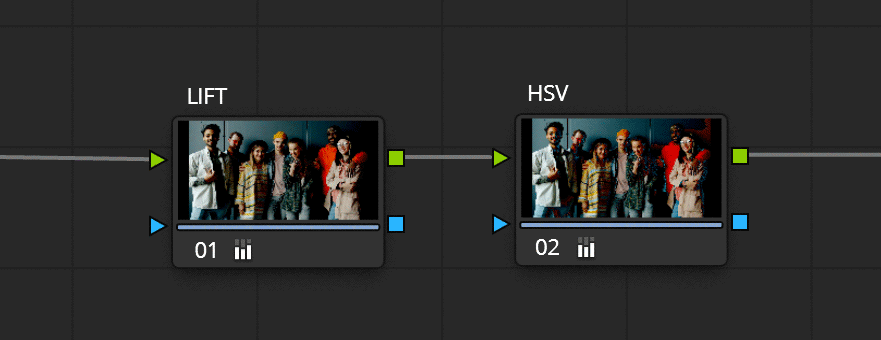
When black values in DaVinci Resolve go negative, their interaction with other nodes operating in different color models, such as HSV (Hue, Saturation, Value), can lead to unpredictable and unintended visual artifacts. For example, in a node tree where a subsequent node functions within the HSV color model, these negatively valued black pixels can manifest as anomalously bright pixels. Rather than displaying as true black, they might unexpectedly appear as bright white or vivid blue.
Below is an image illustrating this issue. The first node is ‘Lift’, where I have adjusted the lift values into negative range. In the second node, I have switched the node itself to operate on the HSV color model. This interaction between the two nodes results in artifacts in the dark areas of the image.
TECHNICAL EXPLANATION
OF THE TOOL
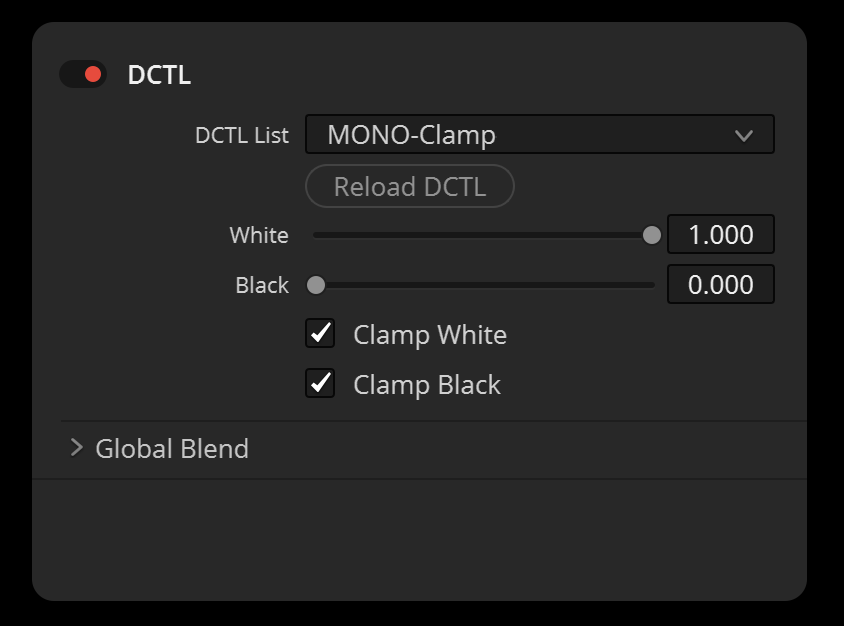
The DCTL Clamping Tool for DaVinci Resolve implements a clamping mechanism:
- Pixel values below 0.0 are clamped to 0.0.
- Pixel values above 1.0 are clamped to 1.0.
This ensures that each color component (R, G, B) stays within the acceptable range, crucial for consistent color representation and avoiding color distortion. The tool is aimed at managing extended color values, providing functionality to clamp or limit color values to ensure they stay within a specified range, which is particularly useful when working with colors that fall outside the standard range.
The tool includes sliders and checkboxes for users to set maximum (white point) and minimum (black point) values, and to decide whether they want to clamp these values. This helps in controlling the color values, ensuring they don’t exceed the set limits.
RECOMMENDED PLACEMENT
IN NODE TREE
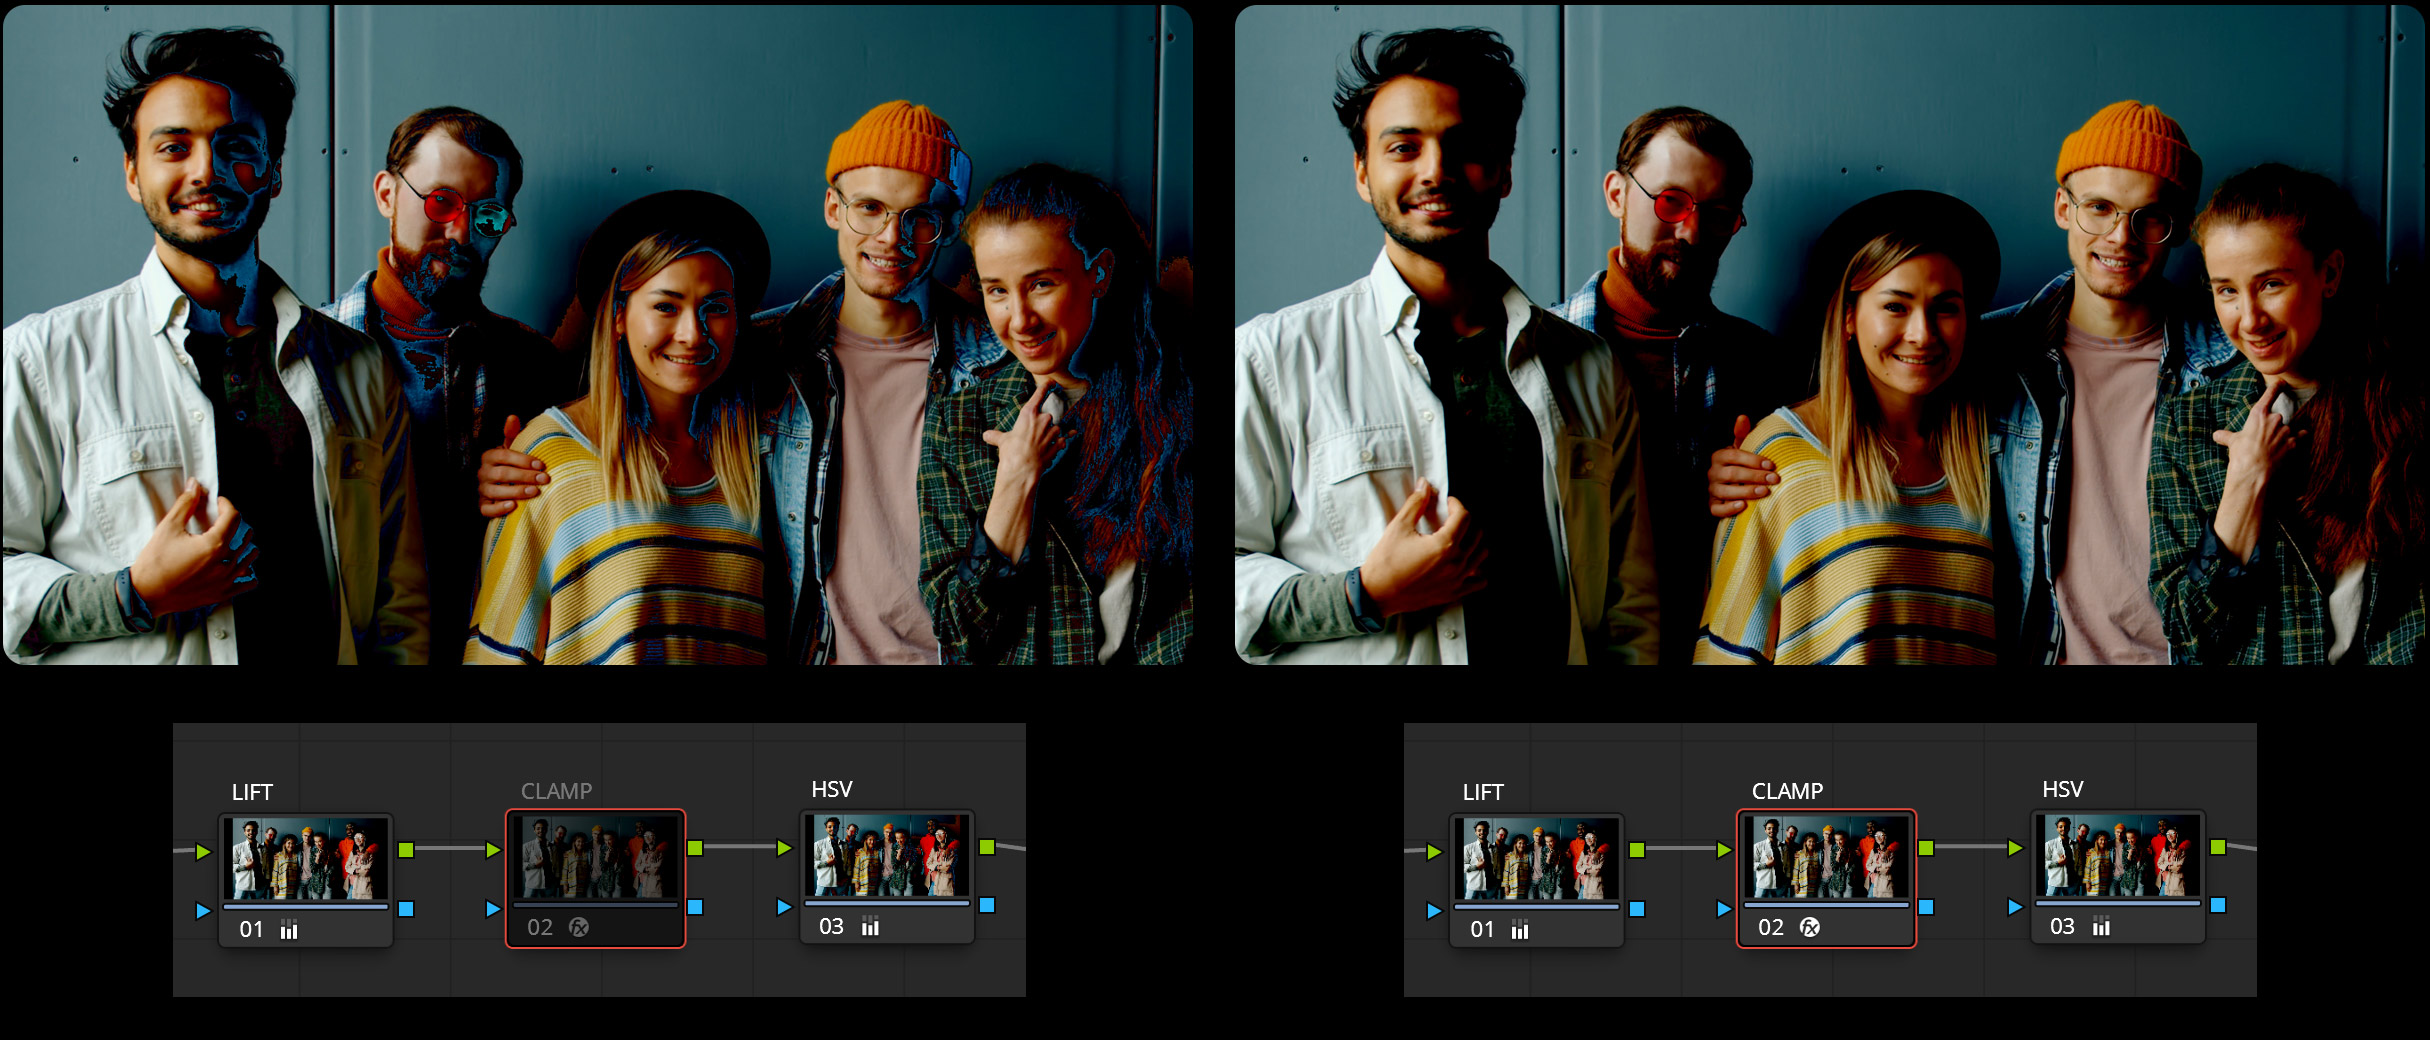
The strategic placement of the DCTL Clamping Tool within your Node Tree in DaVinci Resolve is crucial for maximizing its effectiveness. The position of the tool can lead to different outcomes, each tailored to meet the unique demands of your color grading workflow. Here is an example: In Node One, I decrease the Lift Values. Then, moving to the third Node, I switch the color model to HSV. When the Clamp DCTL is not activated in Node Two, artifacts become noticeable in the black areas of our image. However, by enabling the Clamp DCTL, these issues are successfully resolved, thus preventing undesirable artifacts.
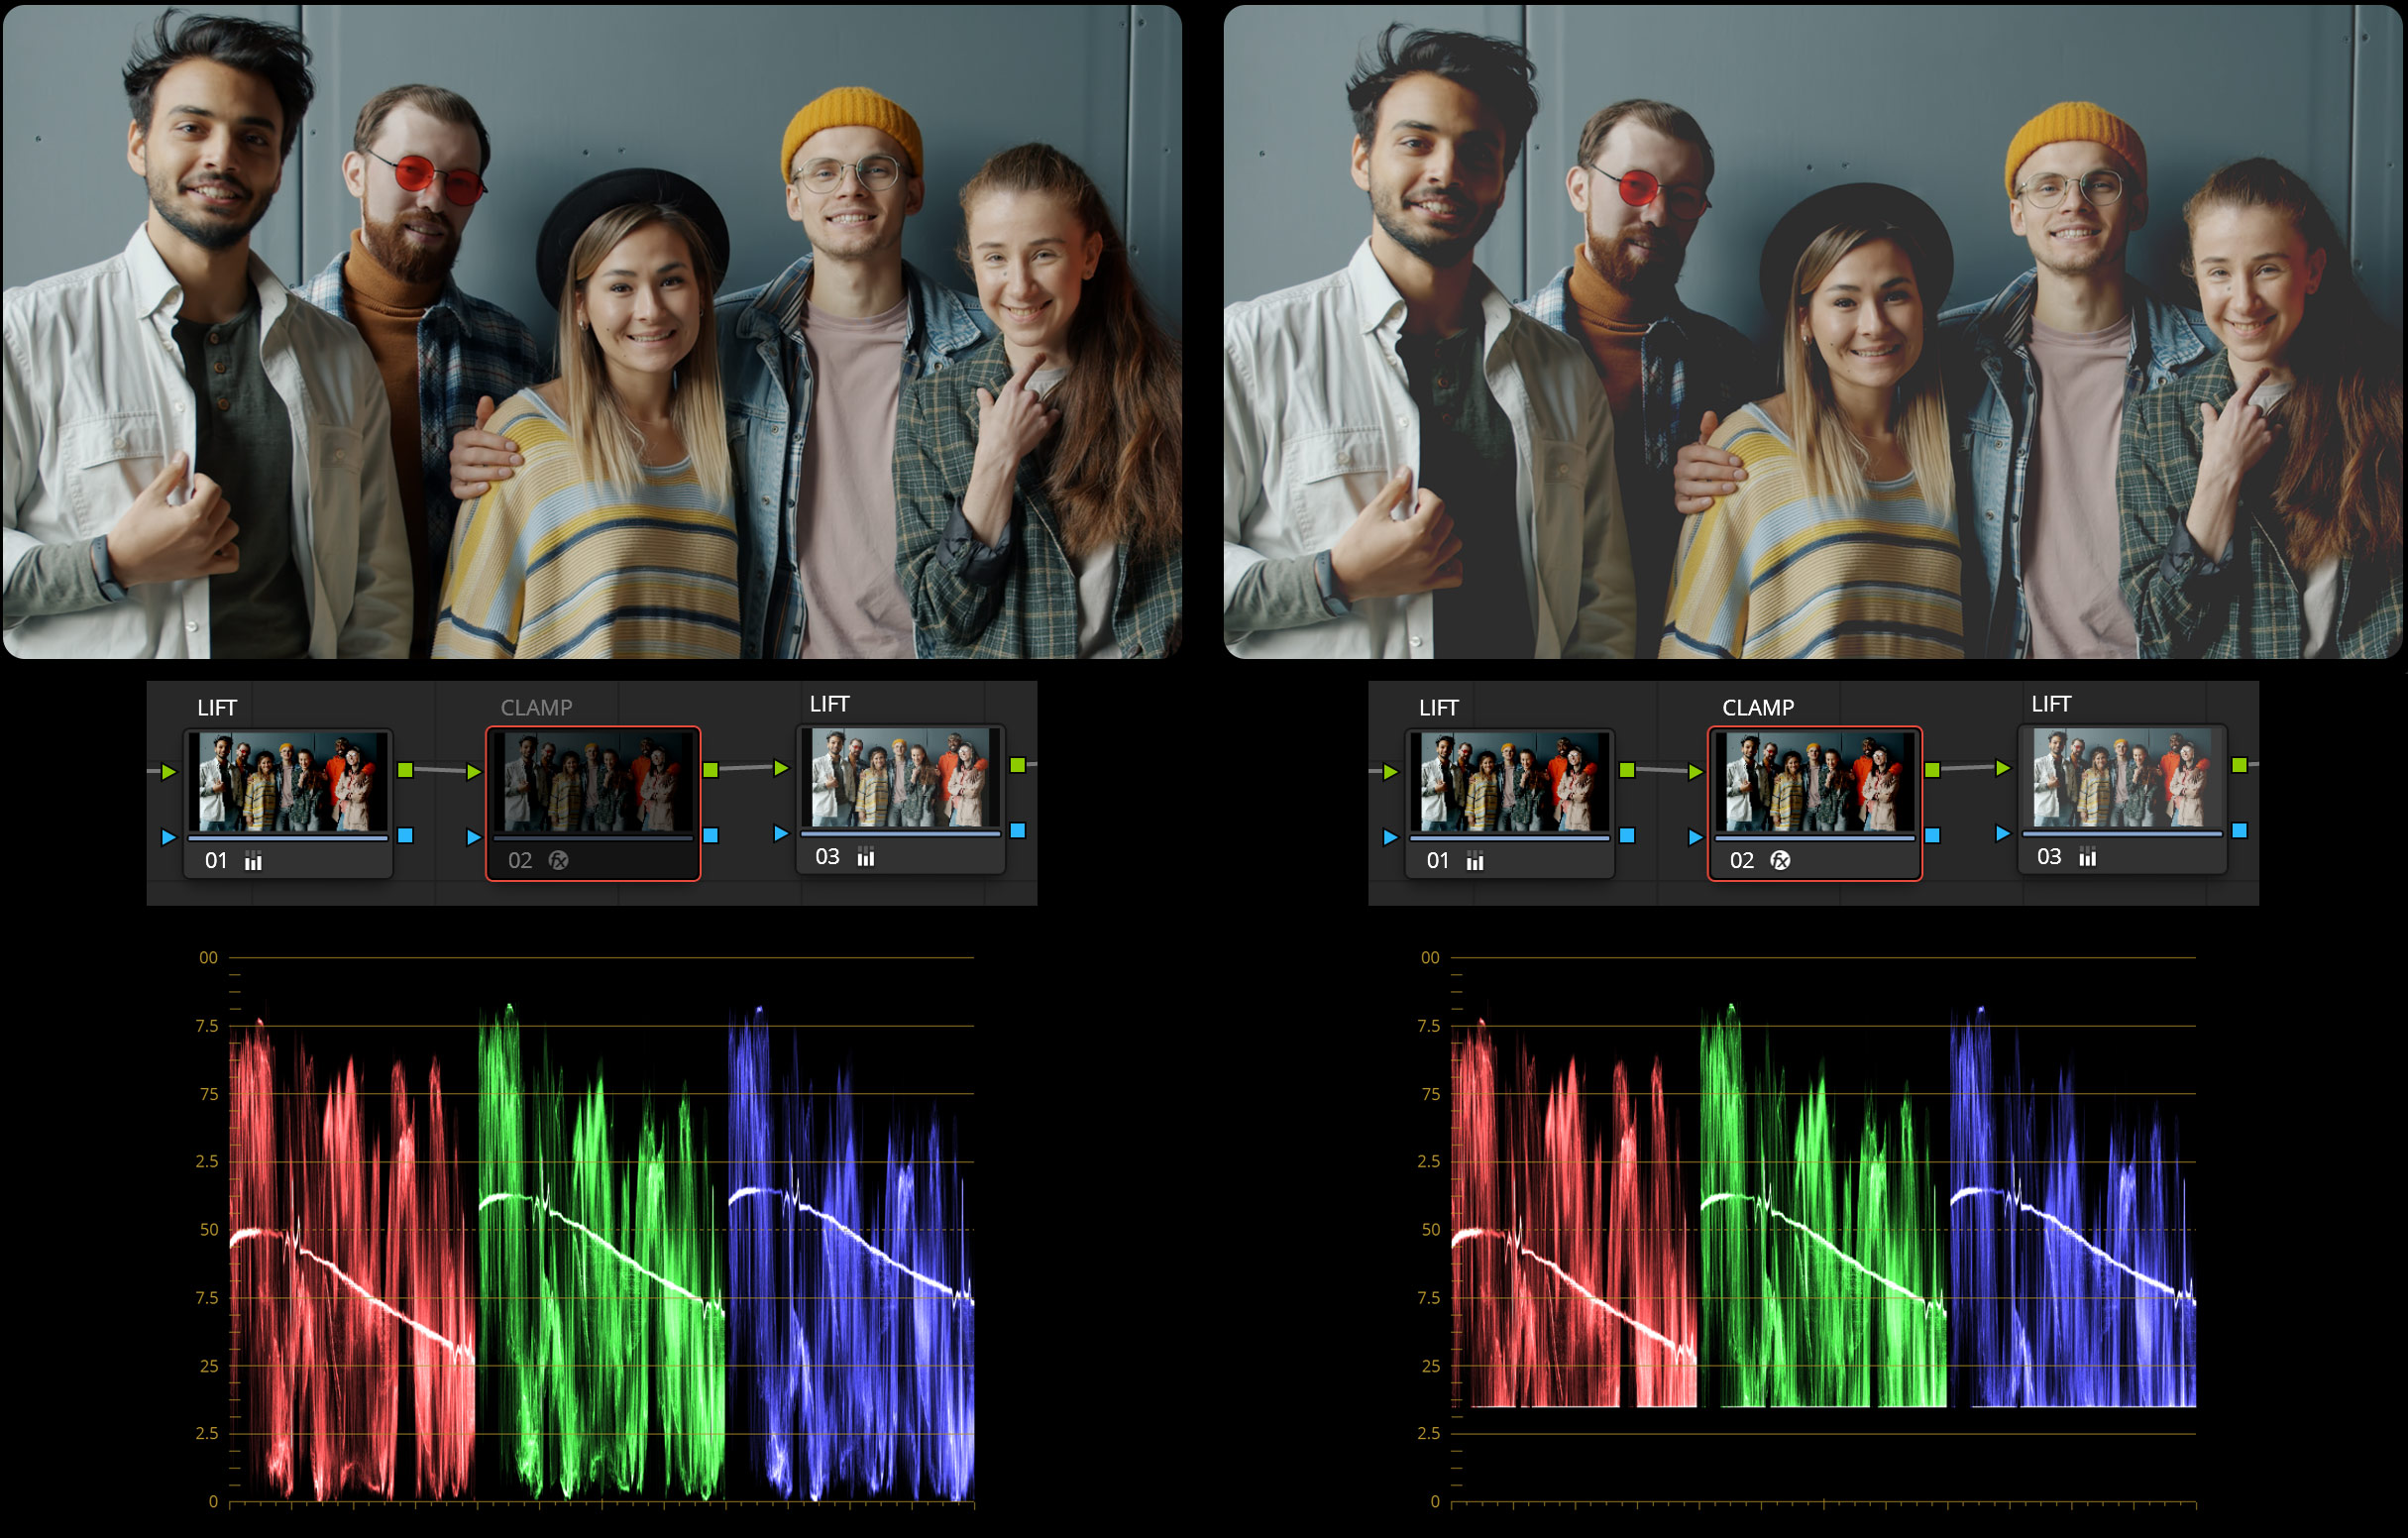
CAUTION IN A 32-BIT FLOAT WORKSPACE
PRESERVING IMAGE DETAILS
In a 32-bit float workspace like DaVinci Resolve, clamping can lead to irreversible data loss if used prematurely. While powerful for maintaining color integrity, its application must be careful. It’s important to be mindful of its potential impact on image details, ensuring critical information is not lost.
In this example, we illustrate the impact of using three nodes in DaVinci Resolve. Initially, in the first node, I reduce the Lift values to negative numbers. Then, in the third node, these values are increased again. The key focus is on the “Clamp DCTL” in the second node. Without this tool, the image appears as expected. But when the clamp tool is applied, there’s a noticeable change: the black levels are significantly cut off. So be careful when using this tool.
FREE DOWNLOAD